Who says Gears can’t be Pretty? A Feminine Birthday Card for my Granddaughter!

Hello my Crafty Friends
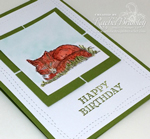
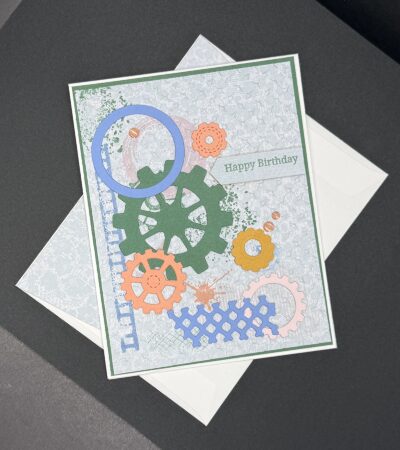
Today’s card features a fun and unexpected color combo — I used the 2006–2008 In Colors to give it a fresh, feminine twist! My granddaughter is a mechanic (she’s loved cars since she was a little girl 🚗), and I knew the Gears & Texture Bundle was perfect for her card. I just didn’t want to go the typical masculine route with the colors. I also pulled out my retired Metal Plate 3D Embossing Folder to create a heavily textured, distressed industrial background that really sets the mood. I hope you love it as much as I do!
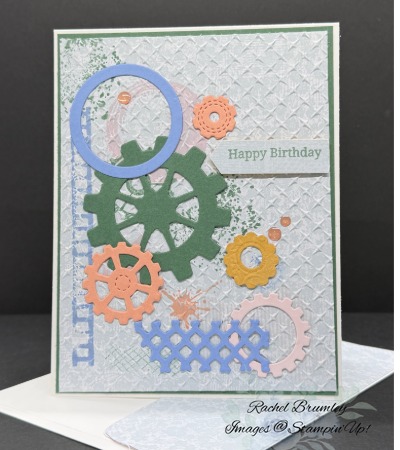
To start, I cut a piece of Basic White Thick Cardstock to 11″ x 4¼” and scored and folded it in half, using my Bone Folder to get a nice crisp crease. Then I layered it with Peaceful Pine Cardstock cut to 5⅜” x 4⅛”, followed by a piece of the lightly patterned Velvet Meadow Designer Series Paper cut to 5¼” x 4″.
Next, I stamped various images from the Gears & Texture Stamp Set using Hydrangea Hill, Peaceful Pine, Crisp Cantaloupe, Barely Blush, and Golden Glow ink. I then ran the patterned paper through my Big Shot with the retired Metal Plate 3D Embossing Folder — it gave it that amazing heavily textured, distressed industrial look! Once that was done, I attached it to the card base.
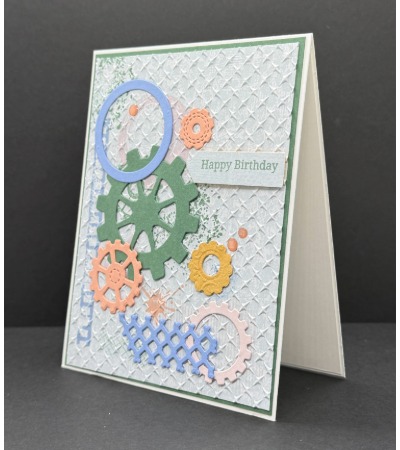
For the die cuts, I used the Gears & Texture Dies to cut shapes from cardstock in those same coordinating colors and adhered them to the front panel using Multipurpose Liquid Glue. (Check out the photos for reference!) I stamped the “Happy Birthday” sentiment from the Banner Sayings Bundle and punched it out with the Three Banner Punch, then popped it up with Stampin’ Dimensionals for a little dimension. To finish things off, I added some Low-Profile Dots for a sweet feminine touch.
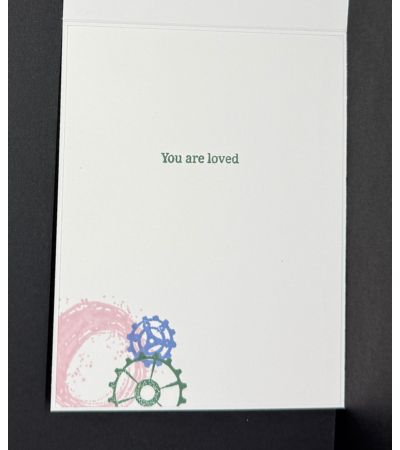
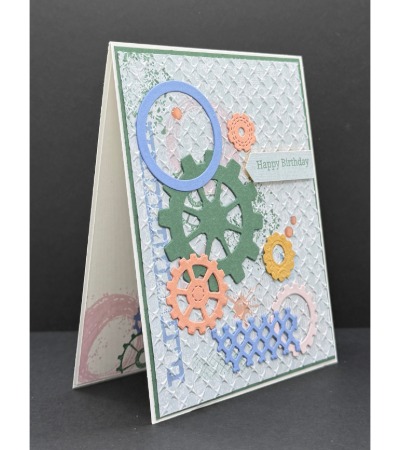
For the inside, I stamped images from the Gears & Texture Stamp Set in Barely Blush, Hydrangea Hill, and Peaceful Pine in the lower left corner, then added “you are loved” stamped in Peaceful Pine along the upper portion of the card — because she really is!
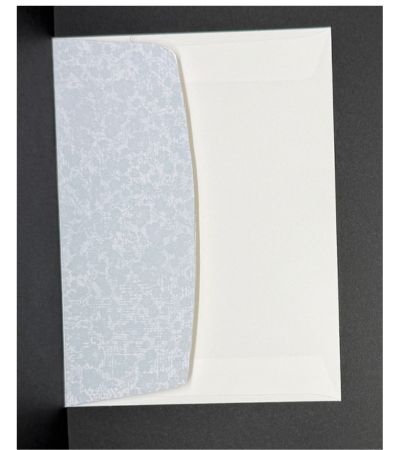
And don’t forget the envelope! I cut a strip of the same Velvet Meadow Designer Series Paper to 6″ x 2¼”, trimmed it to fit, and added it to the envelope flap for a beautiful, coordinated finish. 🎉
If you’d like to get your hands on any of the products I used today, just click the links in the shop below. And if you’re not already a part of my Stampin’ Addicts Facebook community, come join us! We share cards, tips, and so much inspiration every single week. I’d love to see you there!
Thanks so much for stopping by today! I hope this card sparked some inspiration for your next crafting session. Be sure to browse through my Card Gallery for even more ideas—there’s always something new to try with your Stampin’ Up! supplies!
I truly appreciate you being part of my crafting community. Whether you need to stock up on supplies or just want to chat about your next project, I’m always here to help. Feel free to reach out anytime by phone or email—I love connecting with fellow crafters!
Happy stamping, and I’ll see you in the craft room soon!