Circles, Blossoms & a Little Flowering Meadow Magic 🌿

Hi Crafty Friends!
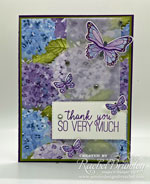
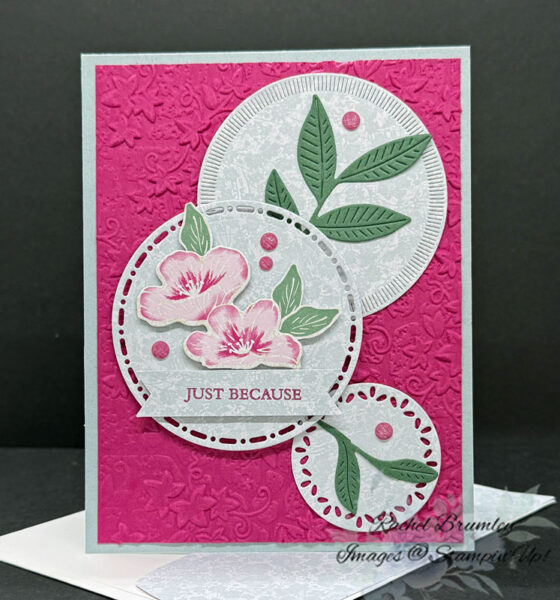
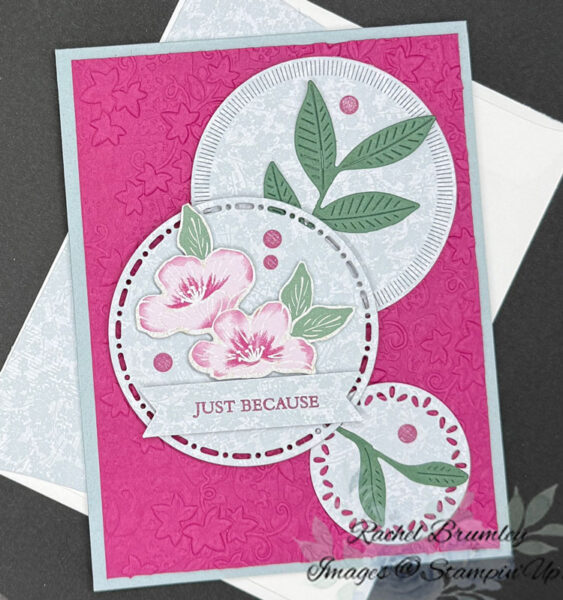
Need to send a note of thanks or encouragement? I love reaching for the Flowering Meadow Stamp Set for exactly that. It includes a variety of sentiments perfect for sharing gratitude, lifting someone’s spirits, or simply staying in touch, and with its mix of greetings and buildable floral images, it’s become a must-have addition to my card crafting supplies! I just loved the way this card turned out!
I’ve decided to include at least one sketch per week – they are nfor your use.
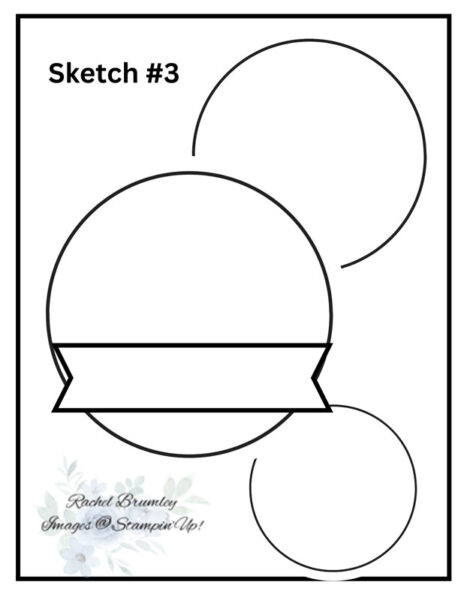
Card Meassurements:
- Base card: Cloud Cover Cardstock (11″ x 4 1/4″)
- Layer #1: Berry Burst Cardstock (5 1/4″ x 4″)
- Circles (2): Velvet Meadow Designer Series (2 1/2″ x 2 1/2″)
- Circle (1): Velvet Meadow DSP (1 3/4″ x 1 3/4″)
- Scrap: For sentiment: Velvet Meadow DSP (2 1/2″ x 3/4″)
- Scraps: Peaceful Pines Cardstock for leaves
- Scraps: Velvet Meadow DSP for leaves
- Inside of card: Basic White Cardstock (5 1/4″ x 4″)
- Scrap: Peaceful Pines Cardstock for leaves
- Envelope Flap: Velvet Meadow DSP (6″ x 2 1/4″
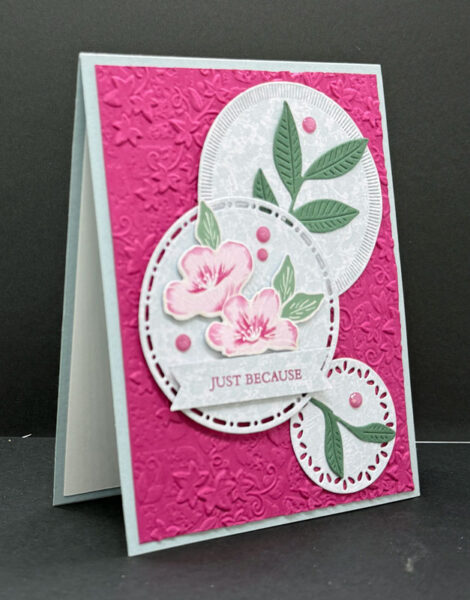
What I did to make this card:
To begin, the base card came together with Cloud Cover Cardstock, folded in half and creased sharply with a Bone Folder. Berry Burst Cardstock was next, embossed with the Vine & Stone 3D Embossing Folder and attached to the base. Three circles followed, created using the Spot on Nature Dies and Velvet Meadow DSP — the upper right circle and the small lower right circle were attached with Multipurpose Glue, while the central circle was popped up with Stampin’ Dimensionals for extra dimension.
From there, the floral pattern paper came into play, with two flowers die cut using the coordinating dies from the Flowering Meadow Dies. The leaves were fussy cut from the same pattern paper with Paper Snips, and additional leaves were die cut from Peaceful Pine Cardstock using the large leaves from the Nature’s Symphony Dies. Both the large and small stems of leaves were attached with Multipurpose Liquid Glue — see the picture for reference.
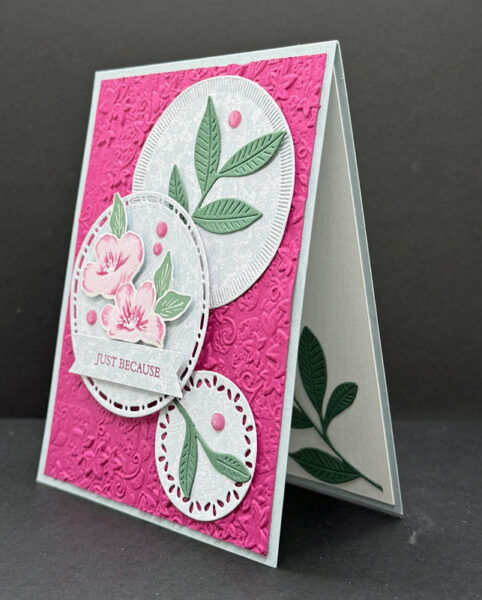
The flowers and small leaves were then added to the center circle with Stampin’ Dimensionals. For the sentiment, Berry Burst ink was stamped on the same pattern paper used for the circles, die cut with the Three Banners Punch, and attached with Stampin’ Dimensionals. A sprinkle of Berry Burst Dots from the Charming Shimmer Faceted Dots finished off the front of the card.
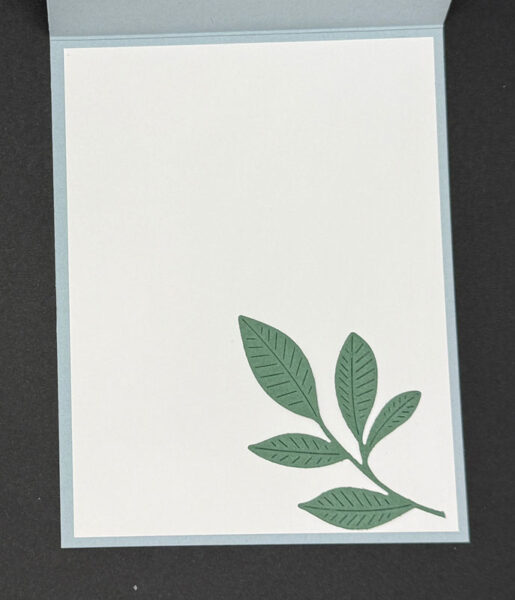
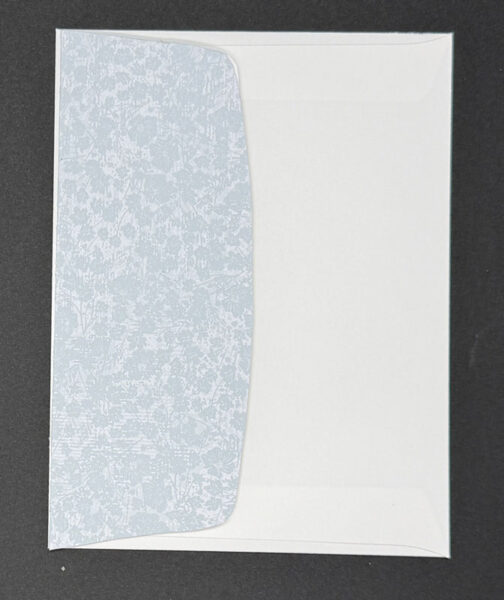
Inside, Basic White Cardstock provided the base, with leaves attached using Multipurpose Glue. The same DSP pattern (as used for the three circles) was carried onto the envelope flap for a cohesive, polished look throughout.
If you’d like to get your hands on any of the products I used today, just click the links in the shop below. And if you’re not already a part of my Stampin’ Addicts Facebook community, come join us! We share cards, tips, and so much inspiration every single week. I’d love to see you there!
Thanks so much for stopping by today! I hope this card sparked some inspiration for your next crafting session. Be sure to browse through my Card Gallery for even more ideas—there’s always something new to try with your Stampin’ Up! supplies!
I truly appreciate you being part of my crafting community. Whether you need to stock up on supplies or just want to chat about your next project, I’m always here to help. Feel free to reach out anytime by phone or email—I love connecting with fellow crafters!
Happy stamping, and I’ll see you in the craft room soon!


Interested? Check out the details here.
Details can be found here

Supplies