How to spread Warm Wishes with the Beary Cute Stamp Set

Good Morning Stampin’ Friends!
I hate to brag but it’s another beautiful day in our area. It was 63 degrees with I walked Sophie this morning and it was gorgeous morning. How is your day going so far? Good, I hope.❤️

- Kits Collection by Stampin’ Up! Sale – up to 30% off
- Bonus Days Redemption Period – don’t forget to redeem your coupons!
- Retired SU Products – priced to sell!
- DSP Paper Share
- September Paper Pumpkin – Celebrate all Things Autumn
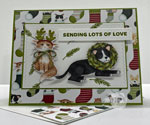
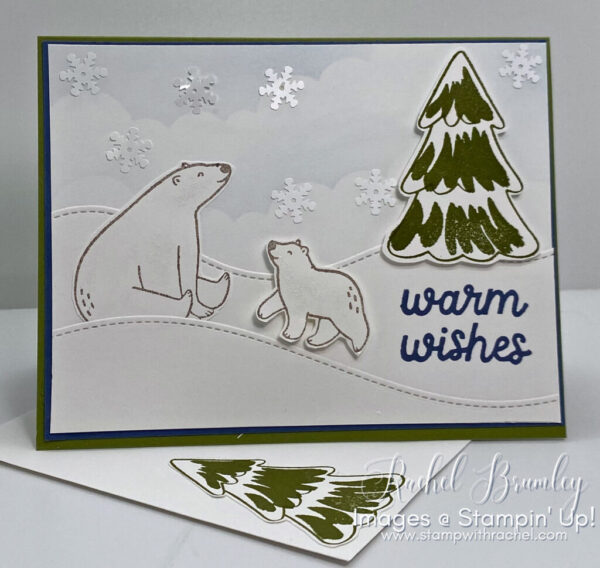
Creating a greeting card using the “Beary Cute” stamp set and the colors Basic White, Misty Moonlight, and Old Olive is a wonderful way to spread warmth and cheer. Follow the steps below to make a charming and personalized card:
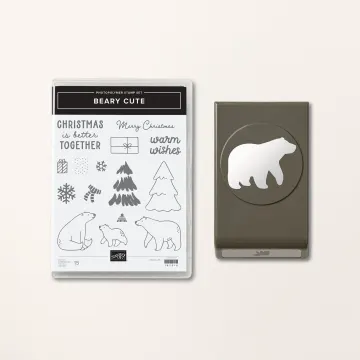
The Beary Cute Stamp Set is filled with magical Christmas images for all your holiday crafting! This set comes with three different polar bears, three holiday sentiments, snowflakes, and other seasonal stamps. The stamps allow you to dress the bears in fun winter clothes, put the tree together, and wrap the presents. Each image that you create can be unique, especially as you fill the images with a variety of colors.
Prepare Your Card Base:
- Cut the Old Olive cardstock to 8 1/2″ x 5 1/2″. Folded in half using a Bone Folder for a sharper crease.
- With the Paper Trimmer cut the Misty Moonlight cardstock to 5 3/8″ x 4 1/8″ and attach to front of card base. This will create a mat that adds contrast and frames the design.
Create the Card Front:
- Cut a piece of Basic White cardstock to 5 1/4″ x 4 1/4″. This will be the main surface for stamping and decorating.
- Die cut (use any die you have for creating levels of snow) two layers for the snow.

Stamping:
- Use the “Beary Cute” stamp set to stamp the bear, trees and sentiment as follows:
- Gray Granite for the bears
- Old Olive for the Christmas trees (3). This is a two step stamp so your first stamp the outline and then you stamp the coordinating matching solid image.
- Fussy cut the bears and trees with our Paper Snips.
- Stamp the sentiment in Misty Moonlight Ink. Stamp image after you have adhered the snow layers to the front of the card.
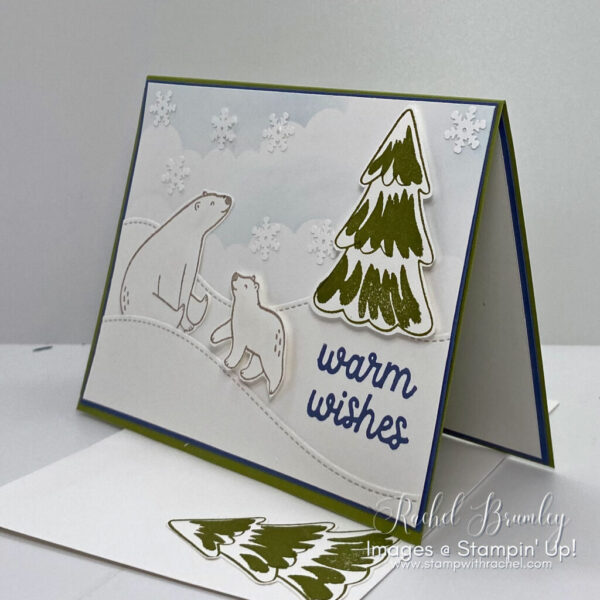
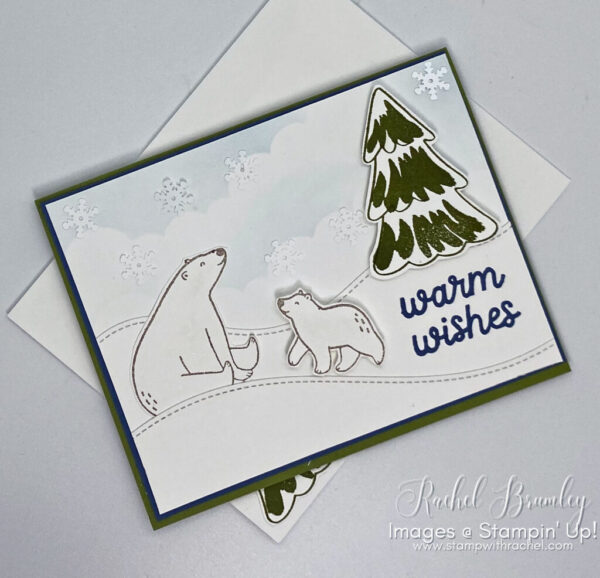
Add Images to the front of the card
- Add the images to the front of the card as shown in the picture above.
- Use the Multipurpose Liquid Glue for the large bear and the Stampin’ Dimensionals for the smaller bear and tree.

- Add the trees to the inside of the card and the front of the envelope with the Multipurpose Liquid Glue.
- Lastly add snowflakes from the Adhesive Backed Snowflakes embellishments.
With these steps, you’ll have a delightful and heartfelt greeting card using the “Beary Cute” stamp set and the colors Basic White, Misty Moonlight, and Old Olive. Personalize it further with your own creative touches to make it truly special!
I just wanted to take a moment to extend my sincerest gratitude to each and every one of you who has taken the time to visit my blog. Whether you’ve been here from the very beginning or you’ve just discovered my blog recently, I appreciate every click, read, and interaction.

Thanks again for stopping by and spending a bit of your time with me. I hope you enjoyed learning about how this card came together. Hopefully you were even inspired just a bit. If you enjoyed my project for today, please be sure to visit my Card Gallery for lots of ideas and inspiration. Have a great day!
If you need any items to make the above project and/or stampin’ supplies, I’d be very happy to be your demonstrator. Just click on this link for instant access to my store.
Or you can drop me an e-mail if you have any questions or would like for me to place the order for you.

The free gift for August is anything from the catalog or online exclusive for $10 or less.
Use this month’s host code when you order $35 or greater and receive that month’s free gift from me! If your order is over $150, please do not use this code. Not using my host code (if your order is over $150) entitles you to free Stampin’ rewards and you’ll still get the monthly free gift.
Note: Make sure that you can see my name on the final checkout page listed as your Demonstrator when you order so that you know that you’re ordering with me.
To see what you can get for $10 or less, click here

I cannot list the new products from the Sep-Dec 2023 until after 6 September 2023.