


Good Afternoon Crafters
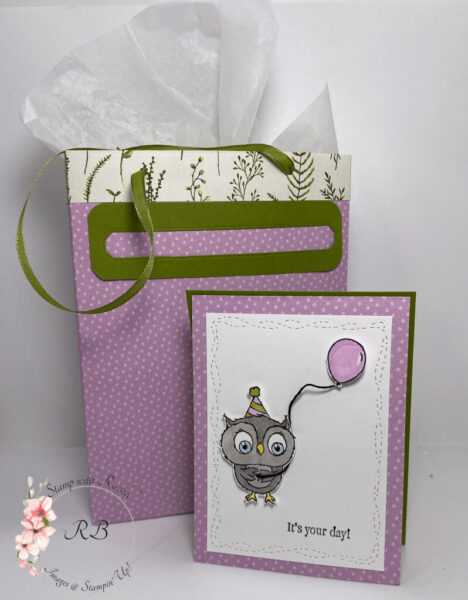
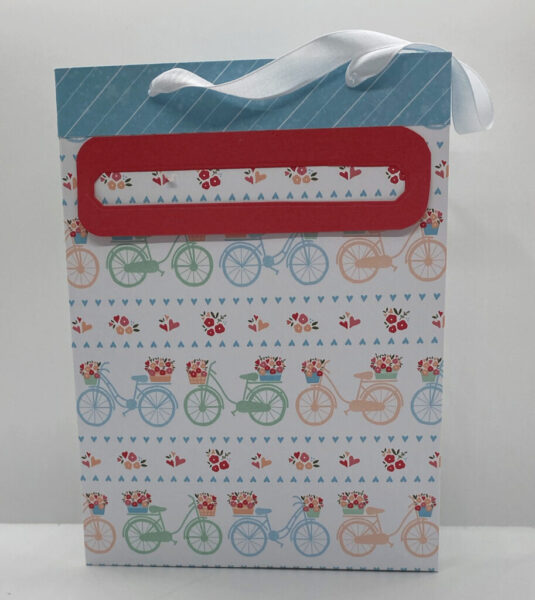
As promised in yesterday’s post, here are the instructions and sketch for the gift bag. The pictures shown as part of the instructions is for a different bag and one I will complete with the coordinating card next week.
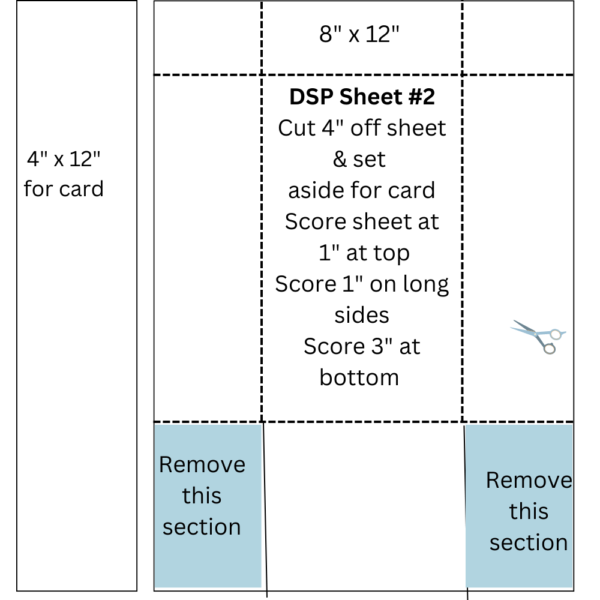
For this gift bag, you need two designer series paper sheets.
1st Sheet:
- At top of sheet, score at 1″
- Sides and bottom, score at 3″
- Use the Bone Folder for a sharp crease.
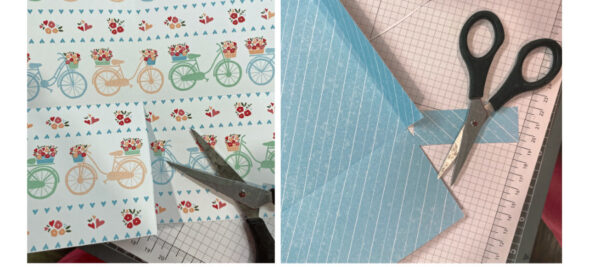
- With Paper Snips, cut on lines (shown in sketch) up to score line

2nd Sheet:
- Cut at 4″ with your Paper Trimmer and set aside for card
- At top and sides, score at 1″
- At bottom, score at 3″
- Score with the Bone Folder for a sharper crease
- With our Paper Snips, cut on lines (shown in sketch) up to score line
Assembling the Gift Bag
- Fold the top (1″) over and add adhesive (I used the Tear & Tape Adhesive) (both sheets)

Cut the two bottom flaps of Sheet #1 (see sketch) and then cut off completely the two flaps on Sheet #2.
Add Tear & Tape Adhesive to bottom flap of Sheet #1.
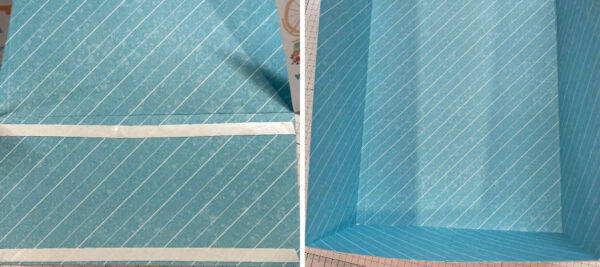
Add Tear & Tape Adhesive to sides and bottom of Sheet #2. Add the two sheets together to form the gift bag.

I always create a template for punching the holes for the ribbon though most demos like to eyeball the punching of the holes.

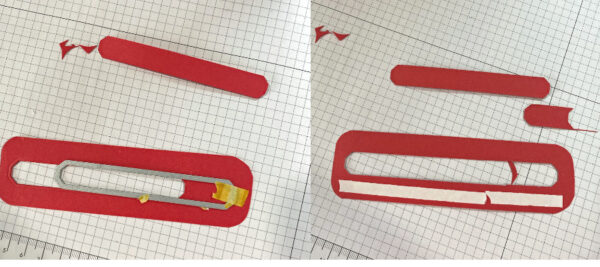
Cut a piece of cardstock (5 1/2″ x 1 1/2″) and round out the corners. To create the slot for the envelope, I used the long label die from the Harvest Dies.
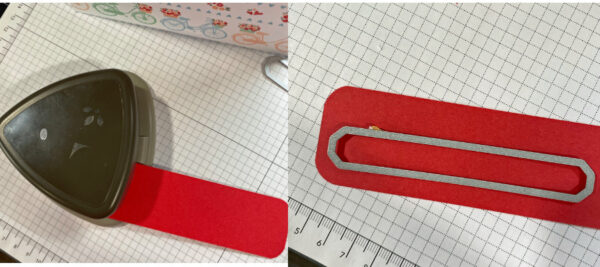
To enlarge the card holder, simply die cut the cardstock again sliding the die to the right (see pix below). Add Tear & Tape and adhere to front of gift bag.
Gift bag finished. I’ll be making the card for this bag next week. If you have any questions regarding the instructions, please contact me at rachelbrumley@cox.net
Thanks for stopping by today! Happy New Year! 🎆


Pingback: Country Bouquet Card and Gift Bag | Stamp with Rachel
Pingback: Instructions for how to create the Adorable Owls Card | Stamp with Rachel