Good Morning Stampin’ Friends
Finally cooling down in our area – so glad I can finally say that. Hope things are improving in your area (heat wise).

- Kits Collection by Stampin’ Up! Sale – up to 30% off
- Bonus Days Redemption Period – don’t forget!
- Retired SU Products – priced to sell!
- Back to School Sales Tax Holiday
- Meaningful Flowers by Paper Pumpkin August Kit (sign ups end 10 August 2023)
- DSP Paper Share – on my blog tomorrow – so stay tuned!
💌 Spread love, positivity, and creativity with this one-of-a-kind card. Whether it’s a birthday, a thank-you, or a just-because card, your handcrafted masterpiece will surely brighten someone’s day!

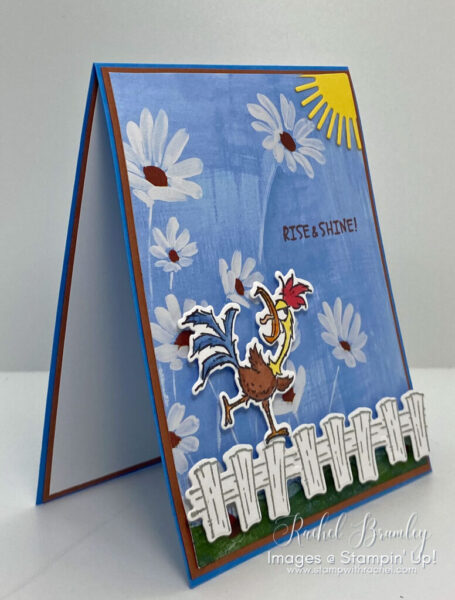
Creating a handmade card using the Hey Chuck Stamp Set and the Fresh as a Daisy Designer Series Paper sounds like a fun project!
Here’s a step-by-step guide to help you make a beautiful card:
- Prepare Your Card Base: Cut a piece of coordinating cardstock to 11″ x 41/4″ for your card base.
- Layer 1: Cut a piece of coordinating cardstock to 5 3/8″ x 4 1/8″.
- Designer Paper: Choose a pattern from the Fresh as a Daisy Designer Series Paper that complements your cardstock. Cut it slightly smaller than your layer 1 to create a mat.
- Stamp Chuck Image: Choose an image from the Hey Chuck Stamp Set that you’d like to feature on your card. Stamp it onto a piece of white or light-colored cardstock using your preferred ink color.

- Color the Image (Optional): If your stamped image is a black and white outline, you can use markers, colored pencils, or watercolors to add color to the image. This step is optional but can add a nice touch to your card. I used Stampin’ Blends for my colors (see product list below)
- Cut Chuck Image and other images: Die cut the stamped and colored images using the coordinating Hey Chuck Dies.

- Arrange and Adhere: Arrange the Fresh as a Daisy Designer Series Paper mat and the stamped images on your card base to find a pleasing layout.Once you’re satisfied with the arrangement, use adhesive to attach the designer paper mat to the card base.
- Sentiment: Choose a sentiment from the Hey Chuck Stamp Set that fits your card’s theme. Stamp it onto the upper right hand of the card front.

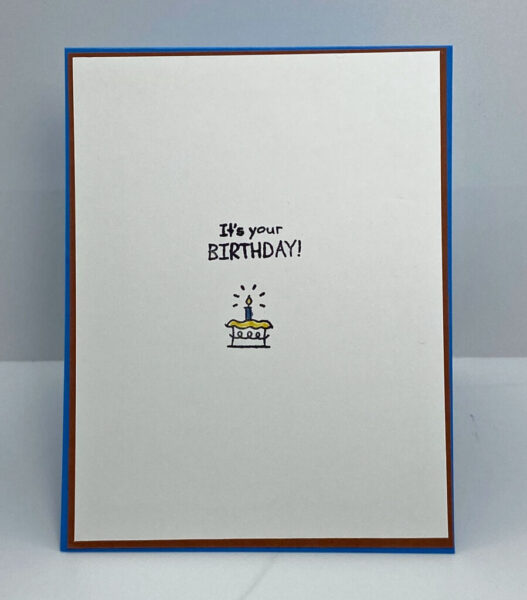
- Personalize the Inside: Don’t forget to add a personal touch to the inside of the card, whether it’s a handwritten message or a stamped sentiment.
Your handmade card using the Hey Chuck Stamp Set and the Fresh as a Daisy Designer Series Paper is now complete! Enjoy giving it to someone special or keeping it as a delightful piece of art.

Thanks again for stopping by and spending a bit of your time with me. I hope you enjoyed learning about how this card came together. Hopefully you were even inspired just a bit. If you enjoyed my project for today, please be sure to visit my Card Gallery for lots of ideas and inspiration. Have a great day!

If you need any items to make the above project and/or stampin’ supplies, I’d be very happy to be your demonstrator. Just click on this link for instant access to my store.
Or you can drop me an e-mail if you have any questions or would like for me to place the order for you.

The free gift for August is anything from the catalog or online exclusive for $10 or less.
Use this month’s host code when you order $35 or greater and receive that month’s free gift from me! If your order is over $150, please do not use this code. Not using my host code (if your order is over $150) entitles you to free Stampin’ rewards and you’ll still get the monthly free gift.
Note: Make sure that you can see my name on the final checkout page listed as your Demonstrator when you order so that you know that you’re ordering with me.
To see what you can get for $10 or less, click here
Products used:


