Blooming Beautiful: My Boutique Blossoms Celebrate Card

Hi Crafty Friends
We had a lovely quiet weekend — I hope your weekend was just as enjoyable – just the way we like it! Saturday brought some much-needed rain, but both days were sunny and bright. Now let’s dive into what’s new for this month!
There’s an exciting new way to join Stampin’ Up! with the Welcome Box, and this month’s Product of the Month is the beautiful Wild Bunch Stamp Set. Two new Kits are also available — Washes of Gratitude and Shaded Petals — and the Last Chance Product List has been updated, so be sure to check it out before your favorites are gone. Additionally, I’ve added a Weekly Challenge from my facebook group, Stampin’ Addicts. Today’s post features the Boutique Blossoms Bundle, so keep reading!
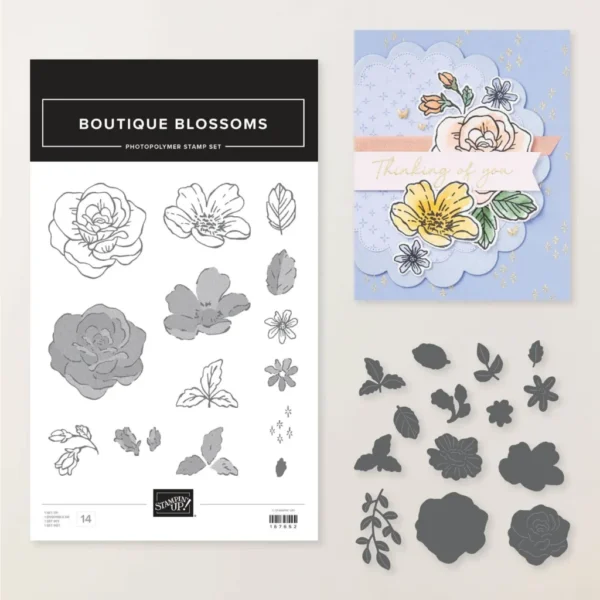
Stamp it, cut it, love it — that’s exactly how I feel about this Bundle! The hand-drawn florals and leaves give my projects that gorgeous sketchbook feel, and the coordinating dies make it so easy to cut, layer, and shape them into beautiful dimensional designs. Together they add so much depth, detail, and an elegant finish — these florals really do it all!
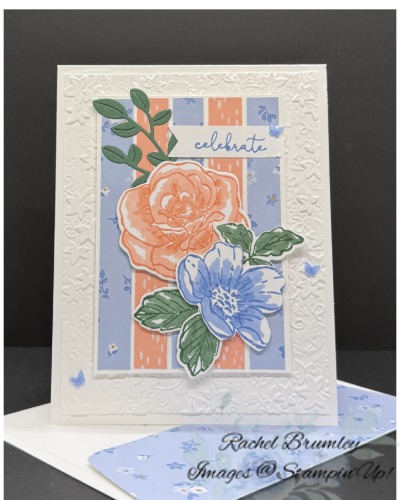
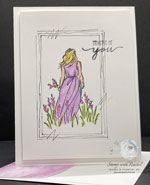
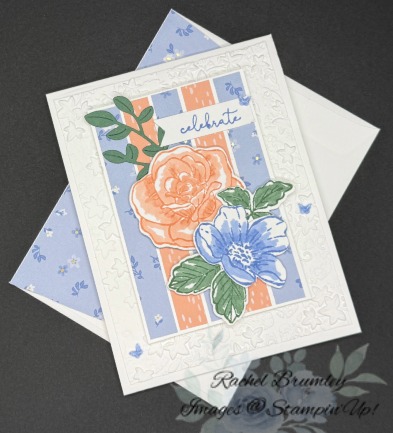
I started by cutting my Basic White Thick cardstock to 11″ x 4 1/4′ and folding it in half with my Bone Folder for a nice sharp crease. I embossed Layer #1 (5 1/4″ x 4″) with the Stone & Vine 3D Embossing Folder, then attached it to the card base with Multipurpose Liquid Glue. Next, I cut the Bloom Boutique Designer Series Paper (DSP) into ½” x 4 1/8″ strips and added them to Basic White Cardstock (4 1/4″ x 3″) — check the photos for placement!
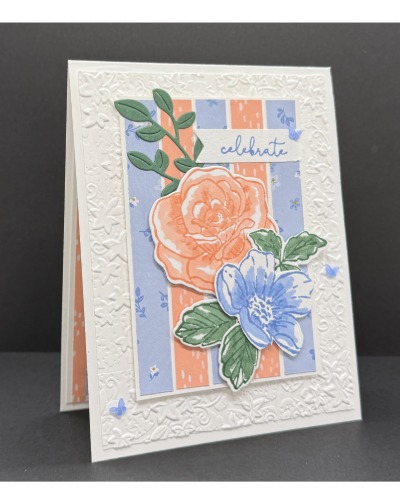
For the flowers, I stamped the large bloom with Crisp Cantaloupe Ink and colored it in with the matching Stampin’ Blends Marker. The smaller flower got the same treatment in Hydrangea Hue, with the leaves done in Peaceful Pine. I also die cut a stem of leaves using the Boutique Blossoms Dies.
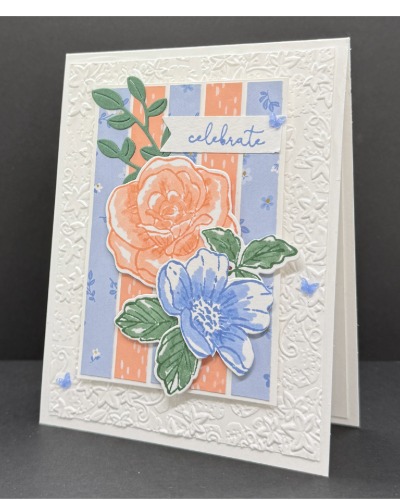
To finish, I stamped the sentiment from the Banner Sayings Stamp Set in Hydrangea Hue Ink onto a strip of Basic White Thick Cardstock, punched it out with the Three Banner Punch and added it with Stampin’ Dimensional. The final touch? Three little butterflies scattered randomly around the florals — so cute!
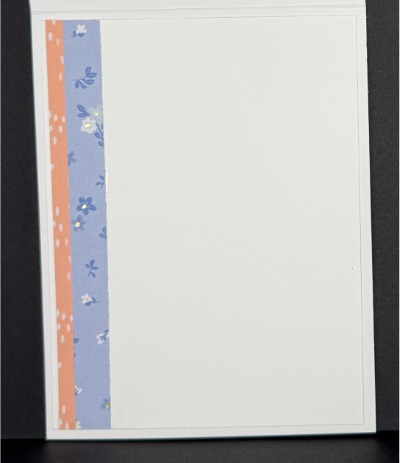
For the inside, I added a layer of Basic White Cardstock (5 1/4″ x 4″) using Multipurpose Liquid Glue, then attached two thin strips (4″ x 1/2″) of the same DSP from the front along the left side. Please note that the Hydrangea Hue strips is layered over the Crisp Cantaloupe strip.
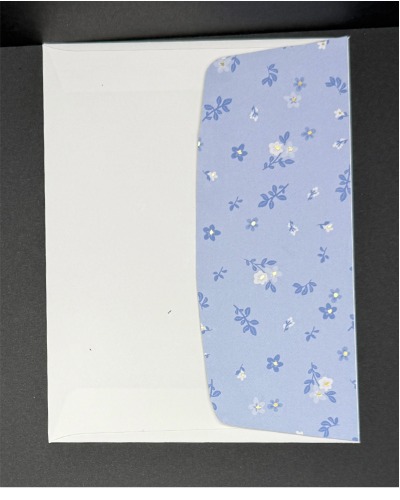
For the envelope flap, I used the Hydrangea Hue patterned DSP and trimmed it to fit perfectly!
I’d love to know what you think of this card! Drop a comment below and tell me.
If you’d like to get your hands on any of the products I used today, just click the links in the shop below. And if you’re not already a part of my Stampin’ Addicts Facebook community, come join us! We share cards, tips, and so much inspiration every single week. I’d love to see you there!
Thanks so much for stopping by today! I hope this card sparked some inspiration for your next crafting session. Be sure to browse through my Card Gallery for even more ideas—there’s always something new to try with your Stampin’ Up! supplies!
I truly appreciate you being part of my crafting community. Whether you need to stock up on supplies or just want to chat about your next project, I’m always here to help. Feel free to reach out anytime by phone or email—I love connecting with fellow crafters!
Happy stamping, and I’ll see you in the craft room soon!

Supplies