


Sometimes intricate die cuts can get lost on your project. Why not add some dimension by turning them into chipboard embellishments?
Here’s how
- Cut multiple copies of your Hello You Thinlits with your Big Shot (In this demonstration, five were used)
-
Apply adhesive to your first die cut, and layer the second one on top.
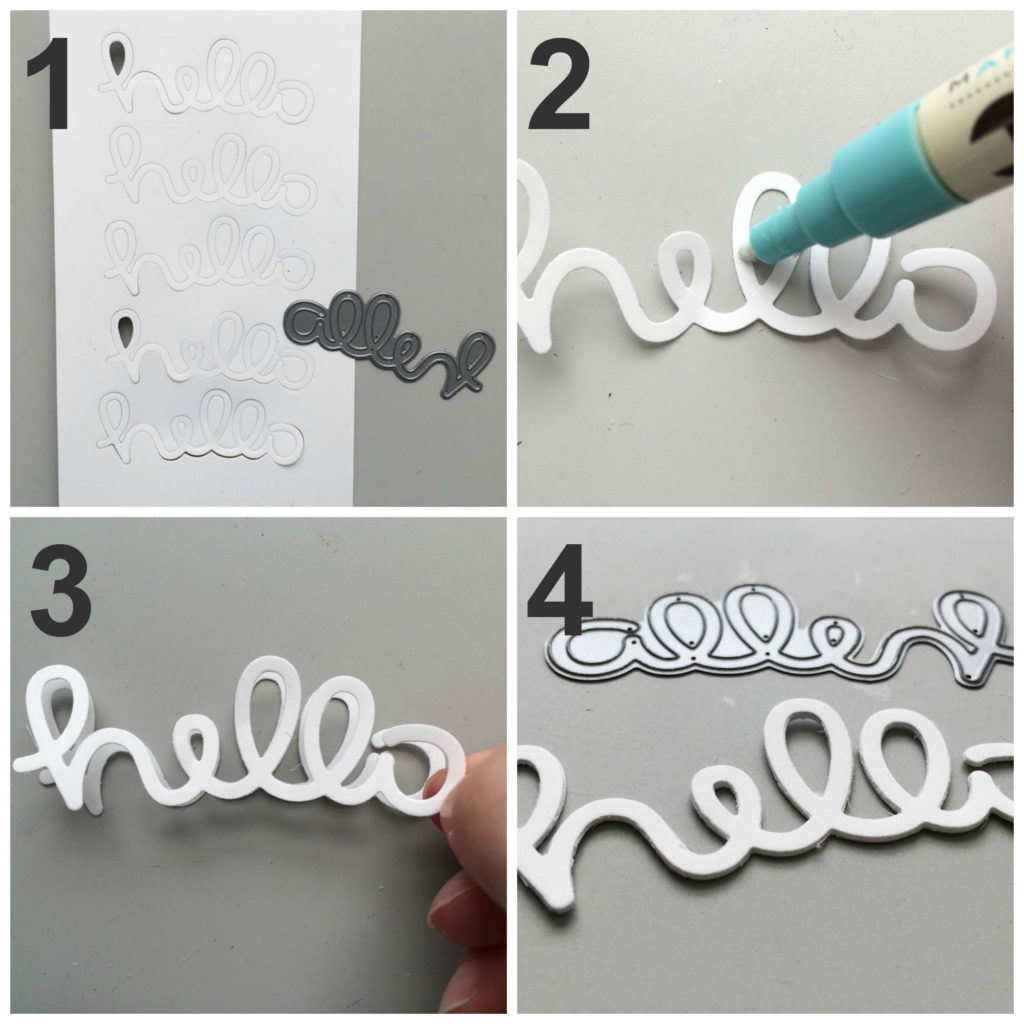
Tip: Liquid glue is best, as it gives you a bit of time to move the die cut and line things up just right.
Step 4:
Stack and adhere remaining layers on top of each other.
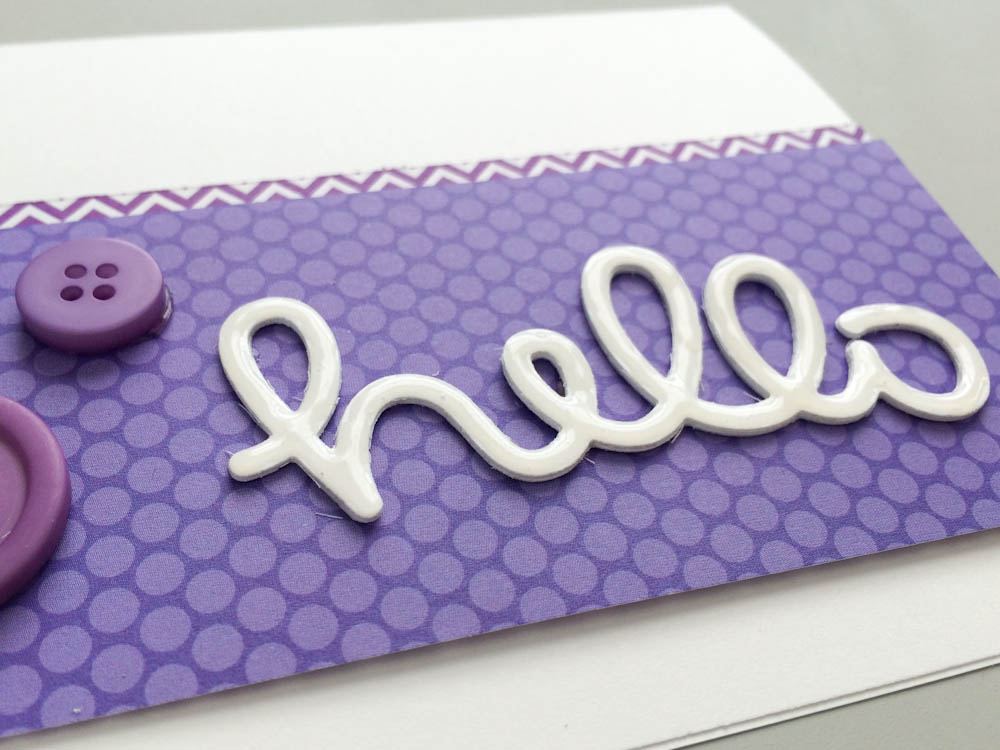
The end result will be a die cut with added dimension, similar to chipboard.
Die Cut Tips: Create your own chipboard
- Card Sale (ongoing)
- Get two free stamp sets and so much more!
- Weekly Deals
- Earn a free stamp set
- June Hostess Code: ZTUMT9BJ
Use hostess code ZTUMT9BJ when placing your online order and you’ll receive a gift from me. If your order is over $150, please do not use it – you will receive your own hostess benefits.
The gift, for using the hostess code for June 2015, is one package of Metallics Sequin Assortment and one package of Itty Bitty Accents Epoxy Stickers.
Want to place an order for Stampin’ Up! supplies, visit my Stampin’ Store for 24/7 service. Ordering is easy and simple and you’ll have your products within seven days. Don’t want to mess with it? Simply call or e-mail and I’ll do the work for you.
- rachelbrumley@cox.net
- (479) 268-4380

