Hello my Stampin’ Friends!
Gracefully transition your florals from summer to autumn with the Charming Day Stamp Set. These exquisite rose and anemone designs feature hand-drawn, calligraphy pen artwork that creates open line art perfect for coloring. Complete with versatile all-occasion sentiments, this set lets you craft beautiful handmade birthday cards, thank-you notes, and so much more!
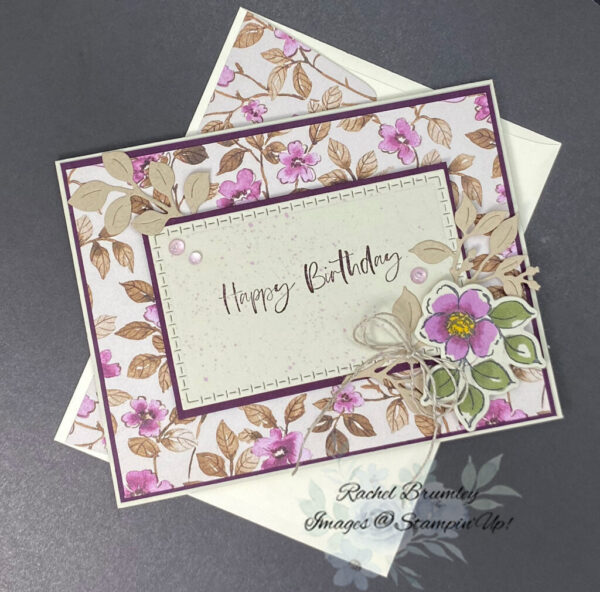
I’ll be honest before we begin the card instructions: it was genuinely difficult for me to cut into this beautiful Flora Charming Designer Series Paper—the pattern is simply stunning!
Card Instructions:
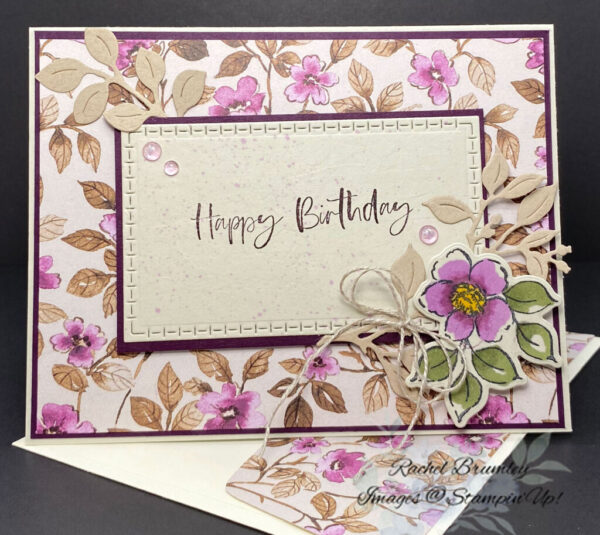
- Creating the Card Base: Begin with a Basic Beige card base measuring 8½” x 5½”. Fold it in half using a bone folder to create a sharp, professional crease.
- Adding the Layers: Attach Layer #1 (Blackberry Bliss cardstock, 5⅜” x 4⅛”) to the card base. Next, adhere Layer #2 (Flora Charm Designer Series Paper, 5¼” x 4″) to the front of the card.
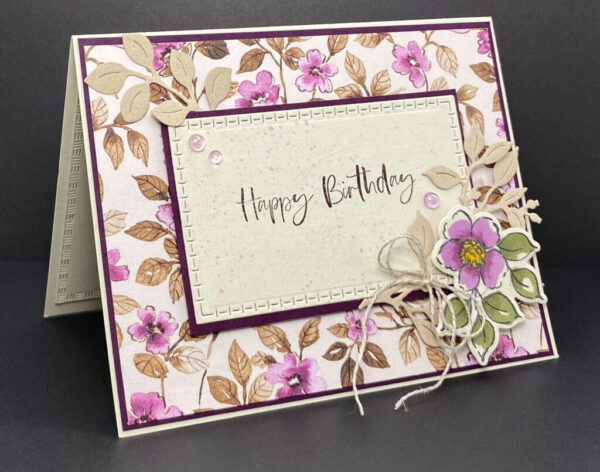
- Creating the Sentiment Panel: Before die cutting, stamp “Happy Birthday” on Basic Beige cardstock measuring 4″ x 2″. Die cut this piece using the fourth smallest die from the Textured Notes Dies set. Splatter Blackberry Bliss ink across the entire front of the panel, then layer it onto Blackberry Bliss cardstock before adding it to the card front.
- Adding Dimensional Elements: Die cut both large and small leaves with stems from Crumb Cake cardstock (4″ x 3″) using the coordinating dies. Attach these to the card front following the placement shown in the reference image.
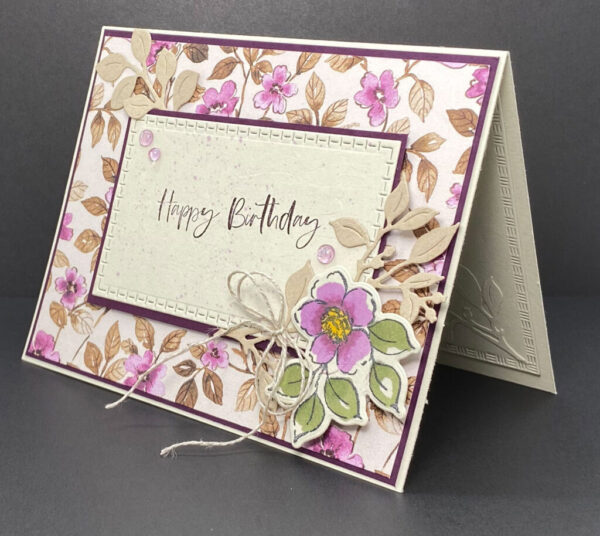
- Coloring and Adding the Flower: Using a Basic Beige piece (2″ x 2″), stamp and color a small flower image from the set. Color the petals with Fresh Freesia and Blackberry Bliss, and use Mossy Meadow Stampin’ Blends for the leaves. Die cut with the coordinating die and adhere to the left side of the top panel.
- Finishing Touches: Create a double bow with Linen Thread and attach it to the right side of the top panel using a Mini Glue Dot. Add small gems from the Tinsel Gems Pack to the top panel, positioning them as shown in the reference image.
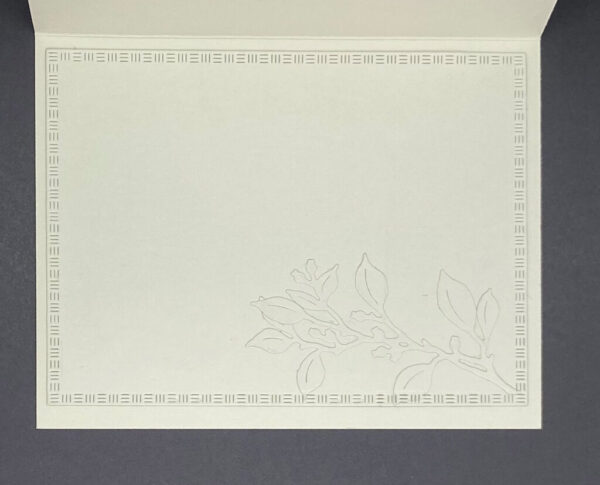
- Inside Panel: Die cut Basic Beige cardstock (5⅜” x 4⅛”) using the largest die from the Textured Notes Dies set. Add a stem and leaves die cut to the lower portion, then attach this panel inside the card.
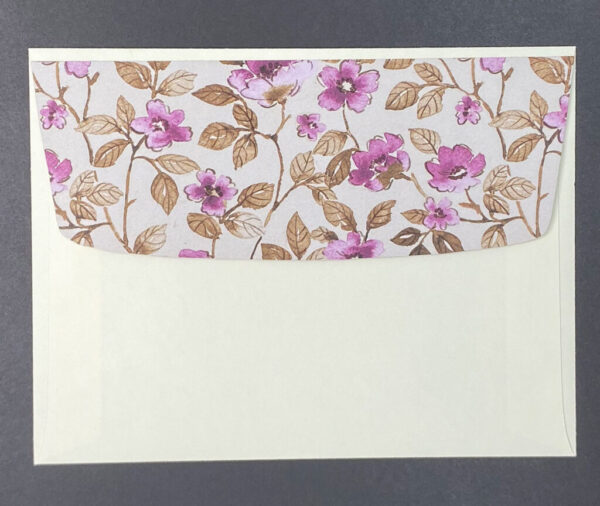
- Envelope Finishing: Complete your project by adding a piece of the same Designer Series Paper used on the card front (2¼” x 6″) to the envelope flap.
Thank you for visiting my blog! I hope today’s card design inspires your own Stampin’ Up! projects. And, don’t forget to check out my Card Gallery for ideas using your favorite Stampin’ Up! products. Your support means the world to me. If you need any supplies or have questions, I’m here as your Stampin’ Up! demonstrator – just email me or call me.
Happy stamping, and let’s keep crafting together!