


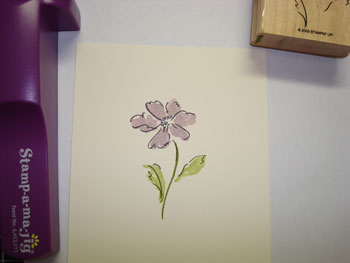
I belong to the Business Stampers Coaching Group and one of our challenges was to write a post about an essential stamping tool. I selected the Stamp-a-ma-jig because I think it's the most misunderstood tool in the catalog.
I was at first intimidated by this tool but the more I use it the more I am comfortable with it. I have to say that I love this tool. I've owned it since 2004 and just recently started using it on my projects. I can't believe it took me this long to use it. The stamp-a-ma-jig is easy to use and works every time. This is the perfect tool to keep you from ever ruining a whole project with one crooked image.

I bought mine when I first became a demonstrator so the one I own is not the black but a burgundy color. I thought I would post some simple directions to show you how easy it is to use.

1. Color the solid image and stamp on card stock
 I
I
2. Color the outline stamp.
3. Place the image sheet securely in the corner of the stamp-a-ma-jig.
4. Align the stamp snugly in the corner and stamp onto the image sheet.

5. Position the image sheet over the solid flower to align the outline stamp.
6. Snugly fit the stamp-a-ma-jig in the corner of the image sheet
7. Hold the stamp-a-ma-jig firmly and carefully remove the image sheet.

8. Firmly hold in place, align the outline stamp snugly in the corner of the stamp-a-ma-jig and stamp onto the solid image. Voila – perfect stamp placement every time!

9. Always clean your image sheet using a baby wipe.


I hope these directions are clear. If not, please leave a comment or e-mail me at rachel@stampingbyrachel.com.
Thanks for stopping by!

