


Welcome to InKing Royalty’s February Blog Hop! During this year’s blog hops, we are having fun with our stamping favorites – our favorite themes for seasonal cards and projects. This month’s projects feature balloons, so you are in for a celebratory treat. We are excited to share our creations with you today! After you read my post, I hope you’ll hop over to the next person on the list at the base of this post.
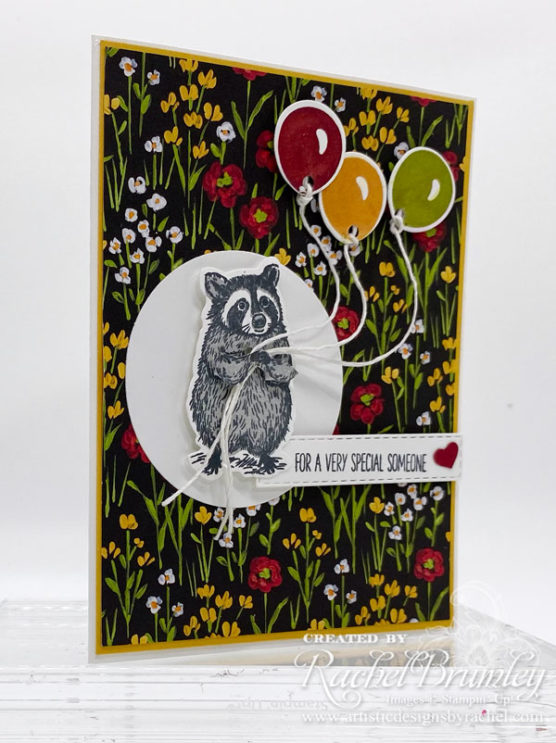
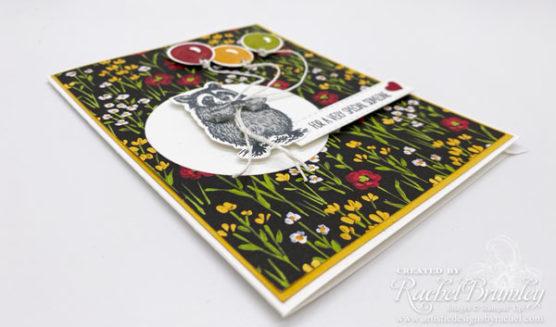
For this month’s blog hop, I’m featuring the Special Someone Bundle paired with the gorgeous Flower and Field Designer Series Paper from the Sale-a-Bration Catalog.

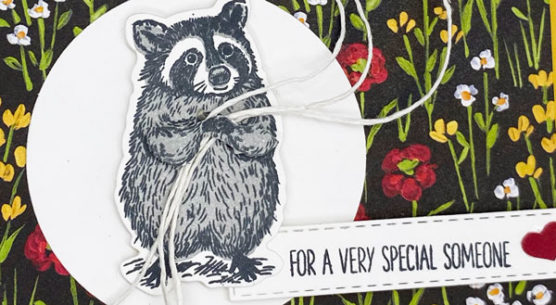
I bet you are wondering how I got the strings from the balloons under the raccoon’s hands? I stamped the image twice and the 2nd image I fussy cut the arms and hands only. I added Stampin’ Dimensionals under each arm and then after adhering to the raccoon, I fed the Whisper White Baker’s Twine between the two Stampin’ Dimensionals.
Card Measurements:
- Base card: 8 1/2″ x 5 1/2″ Basic White Cardstock. Fold in half using the Bone Folder for a sharper crease.
- Next Layer: 5 3/8″ x 4 1/8″ Crushed Curry Cardstock.
- Background DSP: 5 1/4″ x 4″ Flower & Field Designer Series Paper
- Circle: 2 1/2″ x 2 1/2″ Basic White Cardstock
- Raccoon: 2 1/2″ x 2 1/2″ Basic White Cardstock
- Balloons: 3″ x 1″ Basic White Cardstock
- Greeting: 2 1/2″ x 1″ Basic White Cardstock
- Small Heart” Scrap of Cherry Cobbler Cardstock
- First of all, adhere the Base card, Crushed Curry and Flower & Field DSP together with our Multipurpose Liquid Glue. Set aside
- Die cut the 2 1/2″ x 2 1/2″ cardstock using the Layering Circles Dies
- Attach to the card with Multipurpose Liquid Glue
- Stamp the raccoon twice. Since this is a 2-step stamp, stamp the line stamp with Tuxedo Black ink. Then, stamp the solid coordinating image stamp with Gray Granite Ink.
- Die cut one of the raccoons using the coordinating die (Special Day Dies)
- Attached raccoon to the Basic White Cardstock circle with Stampin’ Dimensionals.
- With the 2nd raccoon image, fussy cut the arms and hands using our Paper Snips. Set aside
- Stamp the balloons 3 times with Cherry Cobbler, Crushed Curry and Granny Apple Green Ink. Die cut with the coordinating dies.
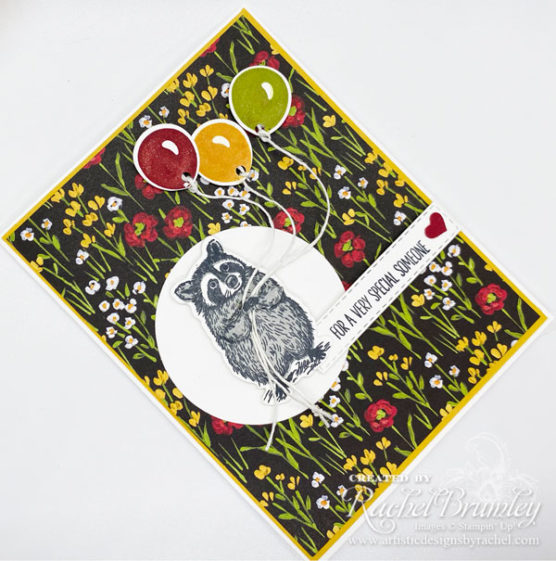
- Punch a small hole in each balloon and attached about 3″ of Whisper White twine to each balloon.
- Adhere the balloons to the card front with Stampin’ Dimensionals (see pix for placement)
- Attached the fussy cut image (arms & hands) to the front of the raccoon with Stampin’ Dimensionals
- Feed the twine under the hands and between the two Dimensionals.
- Stamp a greeting on the 2 1/2″ x 1″ cardstock with Tuxedo Black Ink.
- Die cut using the Stitched Layering Rectangle Dies.
- Attached to the front of the card with Stampin’ Dimensions.
- Punch out a small heart using the Confetti Hearts Punch and attached to the right side of the greeting with the Multipurpose Liquid Glue
- You’re done!
Thank you for stopping by today. I hope you’ll hop along to the next stop on the blog hop, Genevieve Ko at Stampin4Fun. There’s lots of inspiration to be found in this group – and you don’t want to miss it!
Thank you for hopping along with us. If you get stuck during the Blog Hop, please use this line-up as a guide:
- Brian King at Stamp with Brian
- Sue Jackson at Just Peachy Stamping
- Renae Novak at Blessed by Cards
- Lynn Kolcun at Avery’s Owlery
- Robin Myren at Songbird Designs by Robin
- Pam Morris at Tap Tap Stamp
- Linda Krueger at The Stamp Coach
- Sheryl Sharp at Sharp Notes by Sheryl
- Julie DiMatteo at The Paper Pixie
- Joanne Brown at The Inky Dragon
- Rachel Brumley at Artistic Designs by Rachel
- Genevieve Ko at Stampin4Fun
- Shawn de Oliveira at Shawn Stamps
- Jackie Beers at Blue Line Stamping
- Ann Murray at Murray Stamps Ink
- Candy Ford at Stamp Candy

Pingback: Here Come the Balloons for February InKing Royalty Blog Hop - Songbird Designs by Robin % %
Such a cute card! Your extra hands is a great idea.
Pingback: Balloons - Inking Royalty Blog Hop - The Stamp Coach
This card is adorable with the sweet raccoon. I like how you used the twine in the raccoons hands with an “extra” racoon, and how you punched a hole in the balloons to tie the twine. Clever! Thanks for sharing!
Pingback: Balloons for the InKing Royalty Blog Hop – STAMP WITH BRIAN
Pingback: Balloons, Special Someone, and the February InKing Royalty Blog Hop - Just Peachy Stamping
Rachel, I absolutely adore your “real” strings attached to the balloons and how the raccoon is holding them! Such a fun and also very beautiful card!!!
Pingback: InKing Royalty Blog Hop - Balloons - Murray Stamps, Ink
All I can say is “Aww”. Super cute. Love the color and paper selection.
So sweet! I love the colors and the paper, and how you tucked the strings behind his little hands!
Your card is so cute. I love that you fussy cut his hands, what a terrific idea. Love the colors and that FREE paper!!!
Pingback: Birthday Balloon Fun Fold Card – Blessed by Cards w/Renae Novak
This little guy steals my heart every time! Such a cute card and I love the color combo!
The DSP you chose is the perfect background for your sweet raccoon and balloons!
I love that you fussy cut his little arms! Cutest thing ever!!!
OH, Rachel! This is adorable! His tiny, little hands are so sweet with these balloons. Such a great card!
The hands! Brilliant! I just love how we both used the Special Someone set! Great card! I would never have thought to use this DSP, but it works perfectly!
Such an adorable card! Thanks for sharing!