


Hi Crafty Friends!
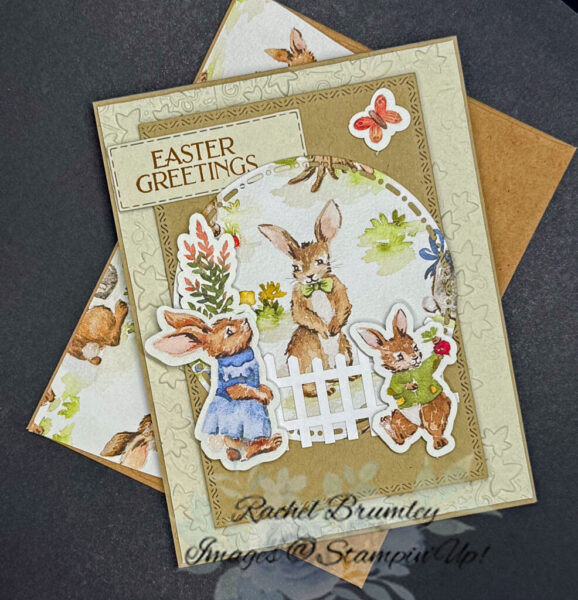
If you’re looking for an Easter card that feels like it jumped straight out of a storybook, this one is for you! I had so much fun creating this sweet Easter Greetings card using the Storybook Moments Designer Series Paper. Those adorable dressed-up bunny stickers just make my heart happy, and the circle shaped die cut gives the whole design such a charming, classic feel. Whether you’re making cards for family or friends, this is one that’s sure to bring a smile to everyone who receives it!

Card Measurements:
- Base Card: Crumb Cake Cardstock (11″ x 1 1/4″)
- Layer #1: Basic Beige Cardstock (5 3/8″ x 4 1/8″)
- Layer #2: Crumb Cake Cardstock (5″ x 3 1/2″) before die cutting
- Layer #3: Storybook Moments Designer Series Paper (3 1/2″ x 3 1/2″) before die cutting
- Greeting: Crumb Cake Cardstock (2 1/2″ x 1″) before die cutting
- Inside of Card: Basic Beige Cardstock (5 1/2″ x 4 1/4″) before die cutting
- Envelope Flap: Storybook Moments DSP (6″ x 2 1/2″)
Card Instructions:
To start, I took the base card and folded it in half using a Bone Folder for a sharper crease. I then embossed Layer #1 with the Stone & Vine 3D Embossing Folder and adhered it to the base card. Next, I die-cut Layer #2 with the second-from-largest die in the Textured Notes Dies and attached it to the base card. For the circle, I die-cut the Storybook Moments DSP using the second-largest circle from the Spotlight on Nature Dies, then adhered it to the front of the card with Stampin’ Dimensionals.
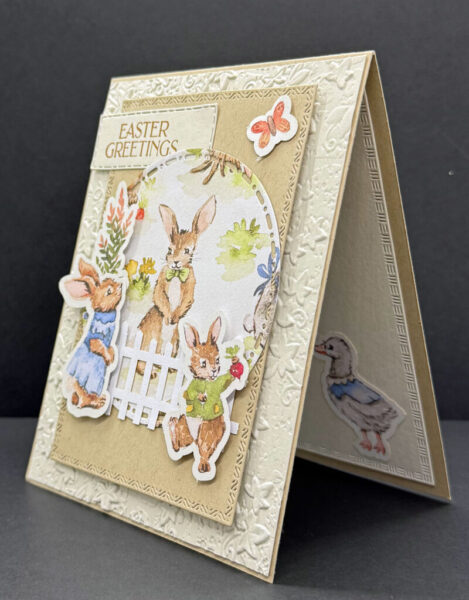
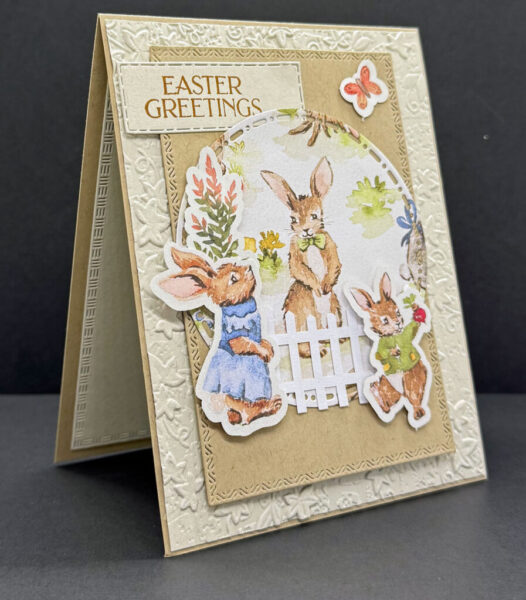
The bunnies, fence, flowers, and butterflies are all stickers from the Storybook Moments DSP. I glued the fence to the bottom of the circle with Multipurpose Liquid Glue, and attached the bunnies and flower stems with Stampin’ Dimensionals. For the mini butterfly, I used Mini Glue Dots. Lastly, I stamped the sentiment with Pecan Pie Ink on Crumb Cake Cardstock and cut it out with the coordinating die from the Textured Notes Dies.
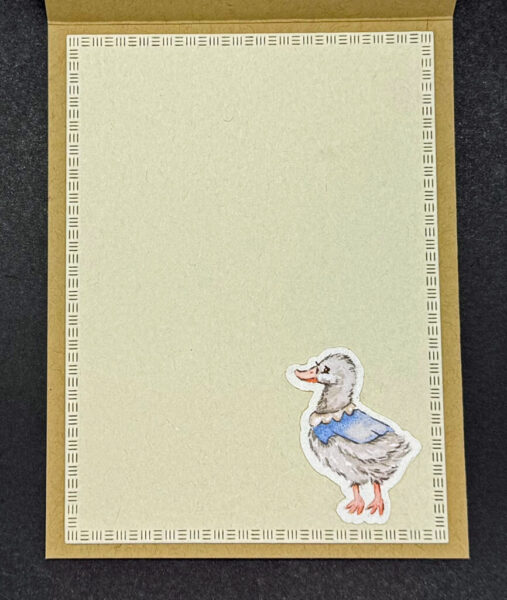

For the inside of the card, I cut a layer of Basic Beige Cardstock with the largest die in the Textured Notes Dies and adhered it in place. The duckling was glued to the lower right-hand side with Multipurpose Liquid Glue. To complete the set, I used the same DSP from the front of the card, adhered it to the envelope flap with Multipurpose Liquid Glue, and trimmed it to size.
Thanks so much for stopping by today! I hope this card sparked some inspiration for your next crafting session. Be sure to browse through my Card Gallery for even more ideas—there’s always something new to try with your Stampin’ Up! supplies!
I truly appreciate you being part of my crafting community. Whether you need to stock up on supplies or just want to chat about your next project, I’m always here to help. Feel free to reach out anytime by phone or email—I love connecting with fellow crafters!
Happy stamping, and I’ll see you in the craft room soon!


Supplies
