


Hi Crafty Friends!
This bundle is perfect for so many projects—wedding cards, scrapbook pages, and meaningful keepsakes. It brings such timeless beauty to my paper crafts, and I know you’ll reach for it again and again whenever you need something truly special!
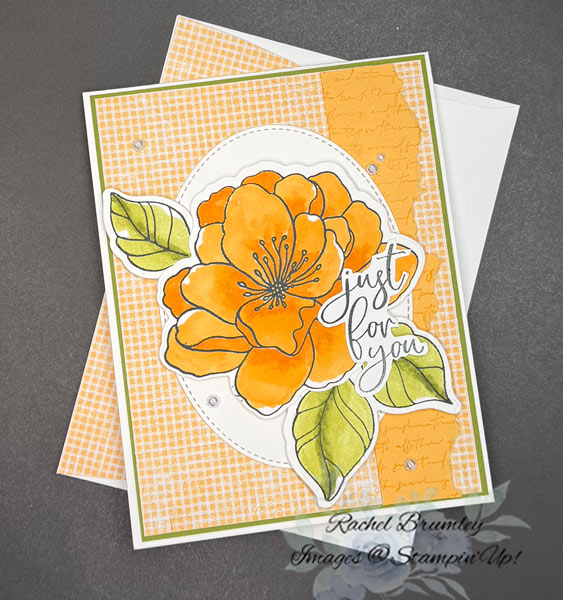
Here’s how I created this beautiful card:
I started by cutting my Basic White Thick Cardstock to 11″ x 4 1/4″ and folding it in half, using my Bone Folder to get a nice sharp crease. Next, I cut a piece of Old Olive Cardstock to 5 3/8″ x 4 1/8″ and attached it to my card base.
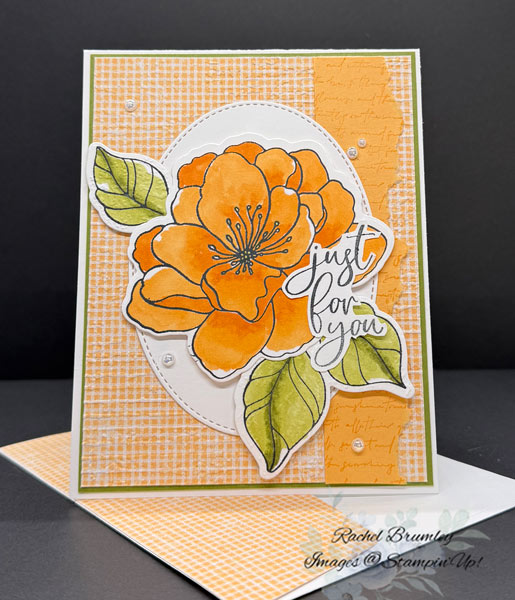
For the pretty gingham background, I cut the Lovely and Beautiful Designer Series Paper (from the Lovely & Beautiful Suite Collection) to 5 1/4″ x 4 1/8″. I ran it through my die-cutting machine with the Exposed Brick 3D Embossing Folder to add that wonderful texture, then glued it to my card base.
To create that soft, organic look on the right side, I cut a strip of Peach Pie Cardstock measuring 5 1/4″ x 1 1/2″ , stamped the strip with the script image from the Elements of Text Stamp Set eand gently tore one long edge. I adhered this torn strip to the right side of my card (you can see the placement in the photo). Then I die-cut a Basic White Thick Cardstock oval using the Layering Oval Dies (cutting the 4 1/2″ x 3 1/2″ size) and popped it onto the center of my card.
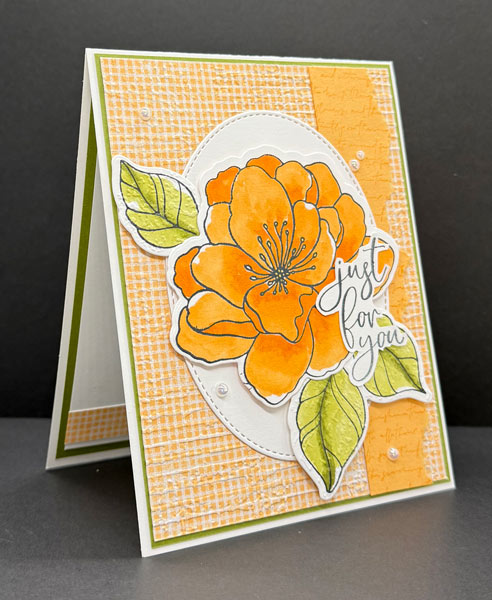
Now for the fun part—the flower! I stamped the large floral image onto a 3 1/2″ x 3 1/2″ piece of Basic White Thick Cardstock, then colored it with my Peach Pie Stampin’ Blends, using the darker shade to add depth in the center of the bloom. For the leaves, I grabbed a scrap of Basic White Thick Cardstock and stamped both the two-leaf image and single leaf image with Tuxedo Black Memento Ink, then colored them in with my Old Olive Stampin’ Blends.
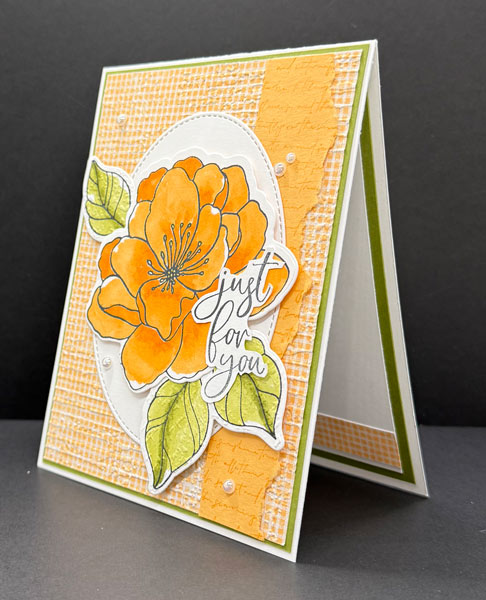
Next I stamped the sentiment with Tuxedo Black Ink on Basic White Thick Cardstock and trimmed around the words.
To finish, I added five pearls from the Iridescent Pearls Basic Jewels, placing them strategically around the card for that perfect touch of elegance. You can see exactly where I placed them in the photo!
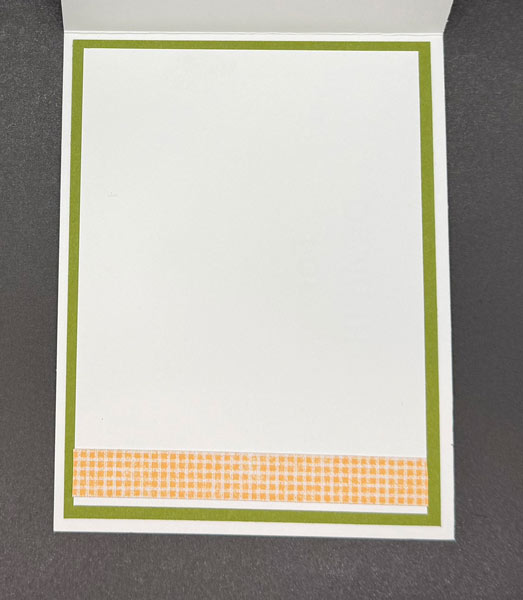

For the inside of my card, I added a layer of Old Olive Cardstock measuring 5 1/4″ x 4″, followed by a layer of Basic White Cardstock cut to 5″ x 3 3/4″. To tie everything together, I attached a thin strip of the same Lovely & Beautiful Designer Series Paper (3 3/4″ x 1/2″) across the white panel.
I didn’t want to stop there, so I also dressed up the envelope! I adhered a strip of the matching Designer Series Paper (6″ x 2 1/2″) across the envelope flap, then trimmed off the excess for a clean, polished finish.
Thank you for visiting my blog! I hope today’s card design inspires your own Stampin’ Up! projects. Don’t forget to check out my Card Gallery for more ideas using your favorite Stampin’ Up! products. Your support means the world to me. If you need supplies or have any questions, I’m here to help as your Stampin’ Up! demonstrator—just give me a call or send me an email.
Happy stamping, and let’s keep crafting together!

Supply List is at the bottom of this post.


Please Note: Bonus Days ends on 2 February!
Get rewarded for all the crafting supplies you’re already going to buy! When you shop between January 6 and February 2 and spend $50, you will earn a $5 coupon! Make sure you save all your coupons because you can redeem them (and we mean ALL of them) between February 3 and 28. And don’t forget—each purchase earns you Stampin’ Rewards, so that’s even more bang for your buck!

January Product of the Month. Claim this exclusive product for only $5 when your cart contains $75. There will be a prompt for you to add the Product of the Month. Limit one, while supplies last.


Supplies
