


Hello my Crafty Friends!
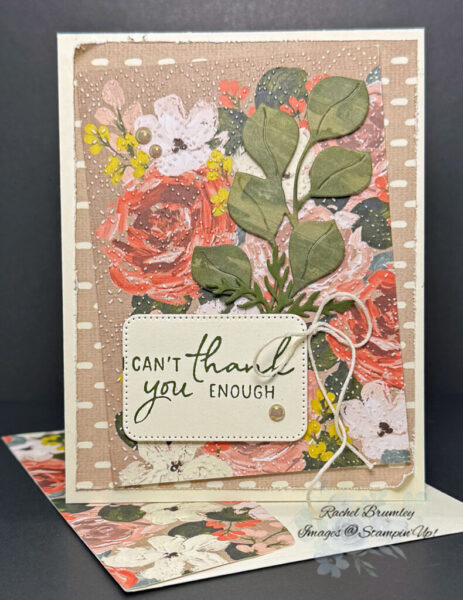
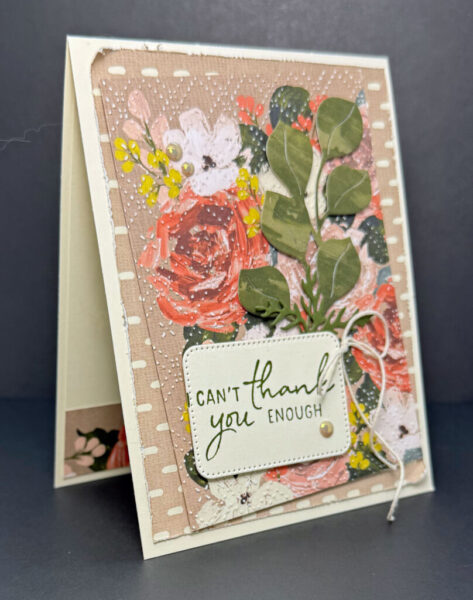
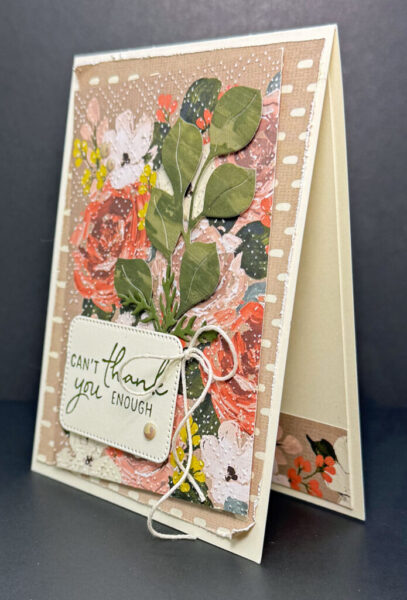
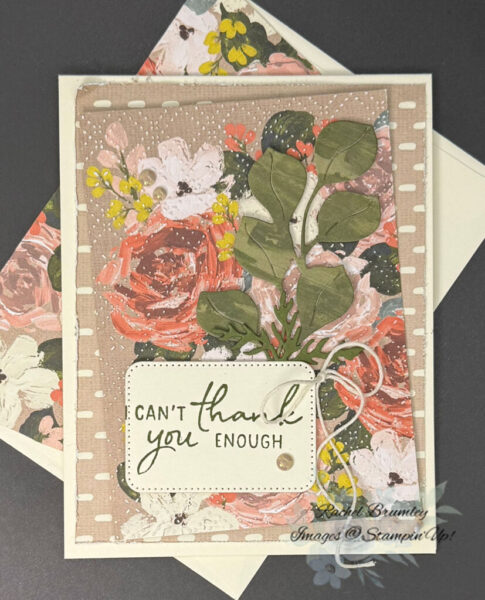
This gorgeous handmade card caught my eye with its layered floral design and touching ‘Can’t Thank You Enough’ sentiment. Featuring coral and pink roses nestled among green foliage, the card creates beautiful dimension through embossed and textured background elements. While it’s based on the Brush with Beauty Designer Series Paper card sample from the Online Store, I added my own personal touches to make the design uniquely mine.
Card Measurements:
- Base Card: Very Vanilla Thick Cardstock (11″ x 1 1/4″)
- Layer #1: Brush with Beauty DSP (5 1/4″ x 4″)
- Layer #2: Brush with Beauty DSP (4 3/4″ x 3 1/2″)
- Layer #3: Brush with Beauty DSP (scrap to make the leave & stem)
- Layer #4: Mossy Meadow Cardstock (scrap to make small stem)
- Sentiment: Very Vanilla Thick Cardstock (2 1/4″ x 2″)
- Inside of Card: Very Vanilla Cardstock (5 1/4″ x 4″)
- Strip for bottom of card: Brush with Beauty DSP (4″ x 1″)
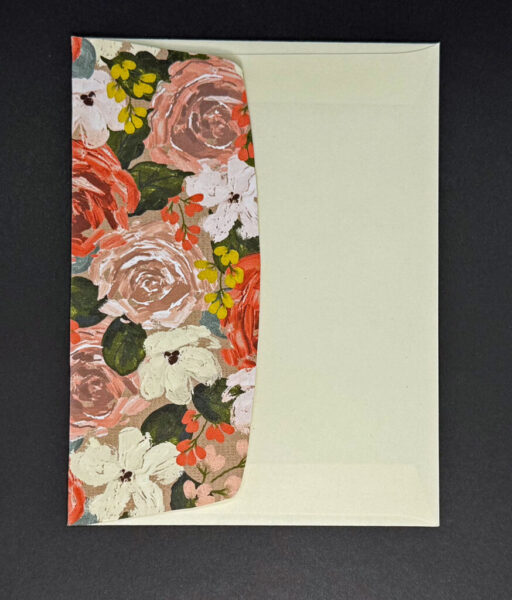
- Envelope flap: Brush with Beauty DSP (6″ x 2 1/2″)
Card Instructions:
- Prepare the base card: Fold the base card in half using a Bone Folder to create a sharp crease.
- Add the first layer: Cut Designer Series Paper (DSP) to 4″ x 5¼”. Distress the edges using Paper Snips or a Distressing Tool, then attach to the base card.
- Create the focal layer: Cut floral DSP to 4⅞” x 3½”. Emboss using the Beautiful Pattern Embossing Folder. Lightly sand the entire surface with fine sandpaper to reveal the white beneath. Attach to the base card at an angle (refer to the sample for placement).
- Add dimensional leaves: Die cut leaves from Mossy Meadow Pattern Paper and attach with Stampin’ Dimensionals. Add a small stem at the bottom of the leaves.
- Create the sentiment: Stamp your sentiment using Mossy Meadow ink on Very Vanilla cardstock. Die cut with the coordinating die from the Nested Essential Dies and attach to the bottom left of the card.
- Add finishing touches: Tie a small bow using Basic Essentials Baker’s Twine and secure with a glue dot to the right of the sentiment. Add pearls from the Pearls of Beauty Embellishments as shown in the reference image.
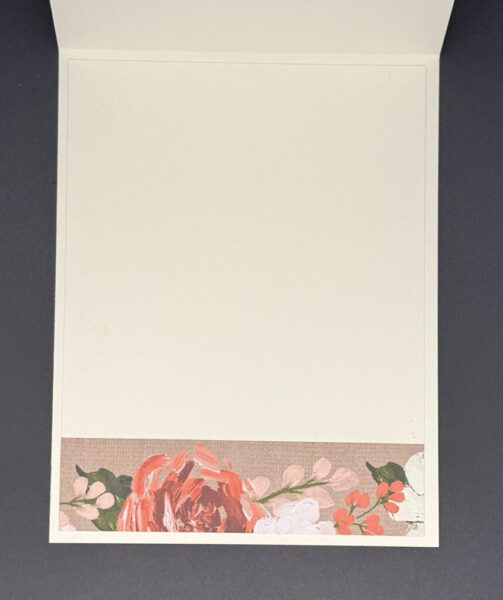
- Finish the interior: Cut Very Vanilla cardstock to 5¼” x 4″ and adhere inside the card. Cut floral DSP to 4″ x 1″ and attach along the bottom edge.
- Decorate the envelope: Add floral DSP to the envelope flap and trim to fit.
I absolutely love the Brush with Beauty Designer Series Paper and will definitely buy more to use even after it retires!
Thank you for visiting my blog! I hope today’s card design inspires your own Stampin’ Up! projects. Don’t forget to check out my Card Gallery for more ideas using your favorite Stampin’ Up! products. Your support means the world to me. If you need supplies or have any questions, I’m here to help as your Stampin’ Up! demonstrator—just give me a call or send me an email.
Happy stamping, and let’s keep crafting together!


Supplies
