


Hello Crafty Friends!
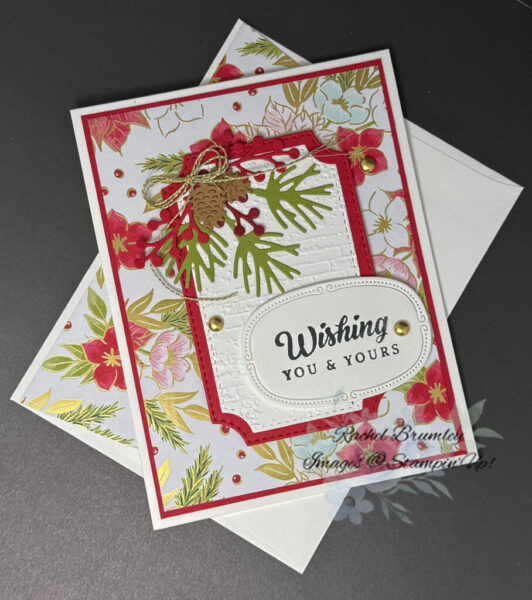
I’m absolutely loving the warm, cozy feeling this holiday card brings to my craft room! The beautiful Traditions of Christmas Designer Series Paper (DSP) caught my eye immediately with those gorgeous reds and golds, and I knew it would be perfect for creating something special for the season.

First, I cut my Basic White card base to 11″ x 4 1/4″ and folded it in half. Then I cut a piece of that stunning DSP to 5 1/8″ x 3 7/8″ – I just couldn’t resist those beautiful reds and golds! I matted it on red cardstock (5 1/4″ x 4″), leaving about a 1/8″ border all around.
For the main focal point, I cut a piece of white textured cardstock to about 3.5″ x 2.75″ using the coordinating die from the Branching Out Dies. I love how the texture adds so much dimension using the Exposed Brick 3D Embossing Folder! I matted this on red cardstock too, using the coordinating die from the Branching Out Dies.
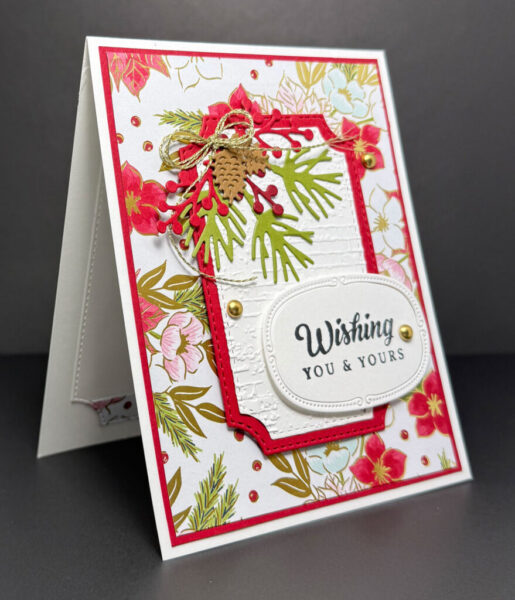
Next, I stamped my “Wishing You & Yours” sentiment from the Peaceful Season Stamp Set on Basic White cardstock and die-cut it with an oval die from the Traditional Labels Dies. I attached it with Stampin’ Dimensionals to make it really pop.
Here’s where the fun begins – I die-cut several pine sprigs from Old Olive cardstock and arranged them at the top corner of my white textured panel. I tucked a little pinecone right in there and tied everything together with some gold metallic thread from the Gold Twisted Thread. It gives it such a natural, woodsy feel!
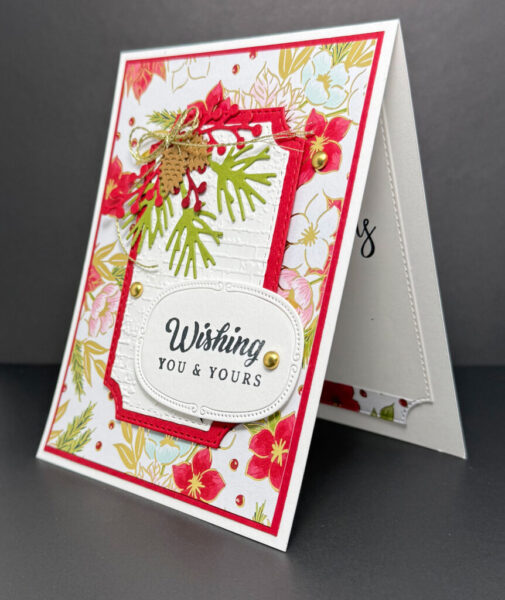
To finish it off, I added a few gold brads for extra shine. The whole thing just came together so beautifully – it’s like bringing a little bit of the outdoors inside for the holidays!
The best part? This design is so versatile – you could easily change up the colors or swap the sentiment for any occasion!
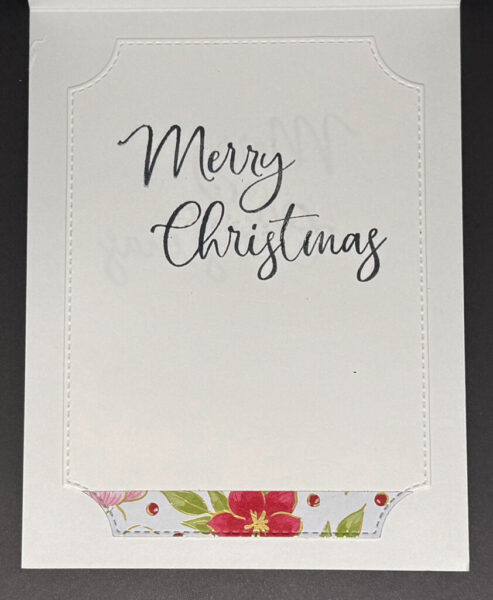
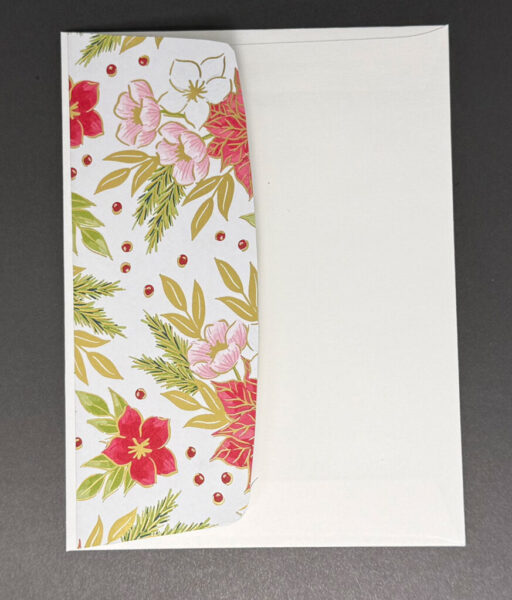
I wanted the inside to feel just as special as the front, so I created a simple yet elegant design that brings everything together beautifully! I added a strip of the same designer paper I used on the front and cut the first layer using the largest die from the Branching Out Dies set. For a coordinating touch, I lined the envelope flap with the same designer paper as well.
Thank you for visiting my blog! I hope today’s card design inspires your own Stampin’ Up! projects. Don’t forget to check out my Card Gallery for more ideas using your favorite Stampin’ Up! products. Your support means the world to me. If you need supplies or have any questions, I’m here to help as your Stampin’ Up! demonstrator—just give me a call or send me an email.
Happy stamping, and let’s keep crafting together!


Supplies
