


Hi Crafty Friends!
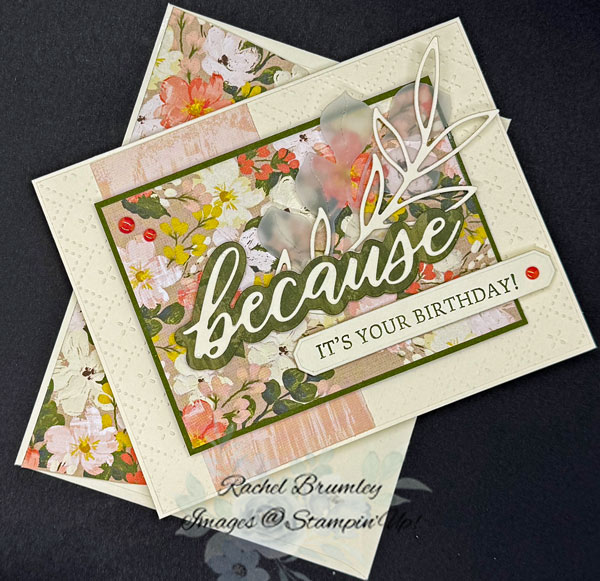
This card was so easy to make! I found inspiration from a design on Pinterest, and I loved that it required only minimal stamping and no coloring. The Brushed with Beauty Designer Series Paper (DSP) does all the heavy lifting with its gorgeous floral prints, and that scripted “because” die cut adds such an elegant touch. Add a textured background, layer everything up, and you’ve got a beautiful birthday card in no time!
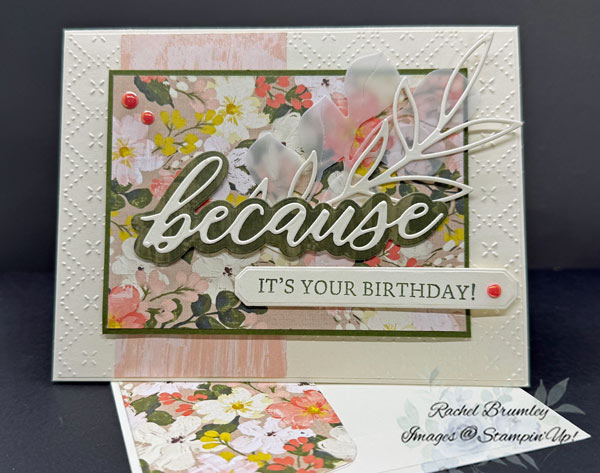
To begin, I cut Very Vanilla Thick Cardstock to 8 1/2″ x 5 1/2″, scored it on the long side at 4 1/4″, and folded it in half using my Bone Folder for a sharp crease
Next, I cut Very Vanilla Cardstock to 5 1/4″ x 4″ and embossed it with the Beautiful Patterns Embossing Folder. I attached it to the card base with Multi-Purpose Liquid Glue, then added a 4″ x 2″ strip of Brushed with Beauty Designer Series Paper to the left side.
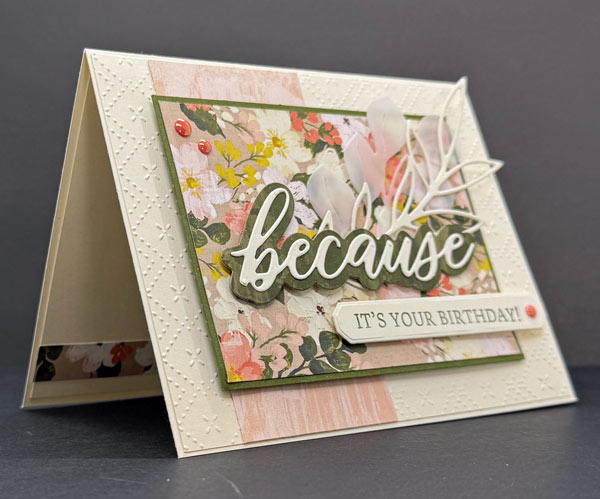
For the main panel, I cut Mossy Meadow Cardstock to 4 1/4″ x 3 1/8″ and Brushed with Beauty Designer Series Paper to 4 1/8″ x 3″. I adhered the designer paper to the Mossy Meadow cardstock, then attached the entire panel to the card front with Stampin’ Dimensionals.
The word “because” is made from two layers. I cut the bottom layer from Mossy Meadow Cardstock and the top layer from Very Vanilla Cardstock, both using dies from the Words of Beauty Dies. After layering them together, I added the word to the front panel with Stampin’ Dimensionals.
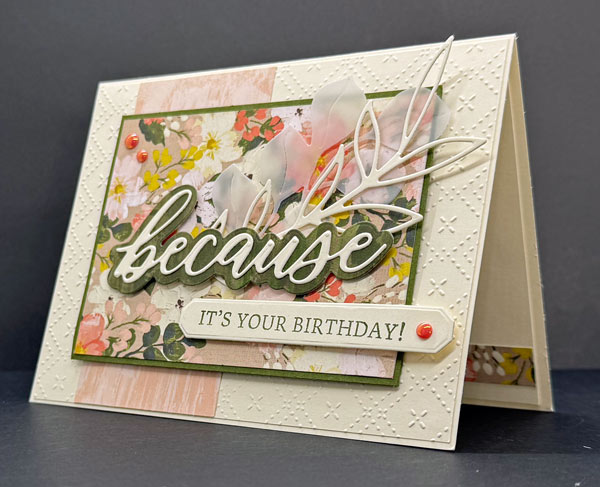
I stamped the sentiment “It’s Your Birthday” from the Words of Beauty Stamp Set in Mossy Meadow Ink on Very Vanilla Cardstock and cut it with the coordinating die. It was also attached with Stampin’ Dimensionals.
For the final touches, I used the leaf die from the Petals of Beauty Dies to cut Very Vanilla Cardstock and the large sprig die to cut Vellum Cardstock. I placed both above the “because” word, then finished the card with embellishments from the Pearls of Beauty pack.
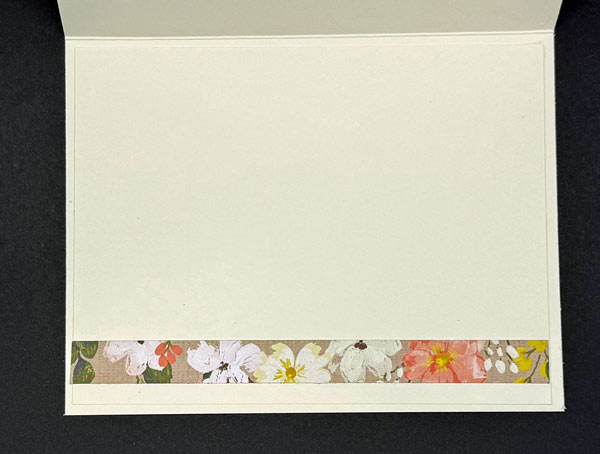
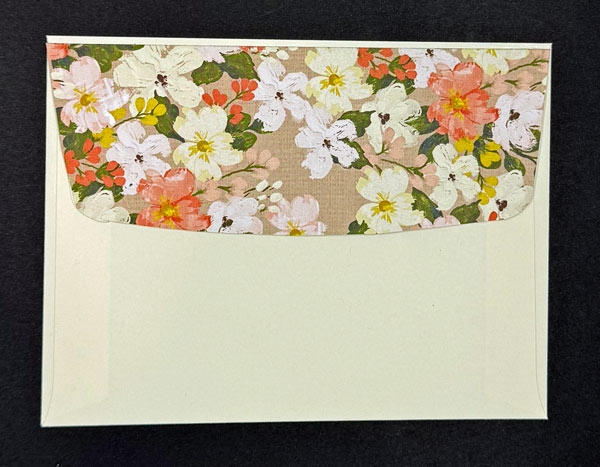
For the inside of the card, I layered Very Vanilla Cardstock cut to 5 1/4″x 4″. I then cut of strip of the Brushed with Beauty DSP (5 1/4″ x 1/2″) and attached to the bottom of Very Vanilla layer. Next I added it to the inside of the base card with Multipurpose Liquid Glue. For the envelope, I attached a strip of the Brushed with Beauty DSP (6″ x 2 1/2″) and trimmed to size.
Thank you for visiting my blog! I hope today’s card design inspires your own Stampin’ Up! projects. Don’t forget to check out my Card Gallery for more ideas using your favorite Stampin’ Up! products. Your support means the world to me. If you need supplies or have any questions, I’m here to help as your Stampin’ Up! demonstrator—just give me a call or send me an email.
Happy stamping, and let’s keep crafting together!


Supplies
