


Hello my Crafty Friends!
Hello to fall and its gloomy, cloudy days! Despite the gloominess, have you been out to see the beautiful fall colors? Now that the nights are colder, they’re really starting to pop! The gloomy weather gives me a perfect reason to spend time in my craft room working on projects, which I absolutely love to do. How do you spend your gloomy days?

I’m thrilled to share this incredible limited-time opportunity with you! Right now, you can join our SU team for just $25 or $99 – these promotional prices offer exceptional value for everything our program provides. I’m actively seeking individuals who want to be part of something amazing, and this special pricing makes it the perfect time to get started. With this fantastic offer ending on October 31st, 2025, I encourage you to take advantage of these unbeatable rates while they’re still available. Don’t miss your chance to join our dynamic team and start your journey with SU at these incredible savings!
If you have any questions, please contact me at rachelbrumley@cox.net – I would love to chat with you.

You can create dreamy cards, tags, and more with the Brushed with Beauty Designer Series Paper (DSP). Delicate designs in soft pinks, yellows, blues, and greens, including stripes, polka dots, and florals, make layering paper accents easy and fun.
Card measurements below the signature.
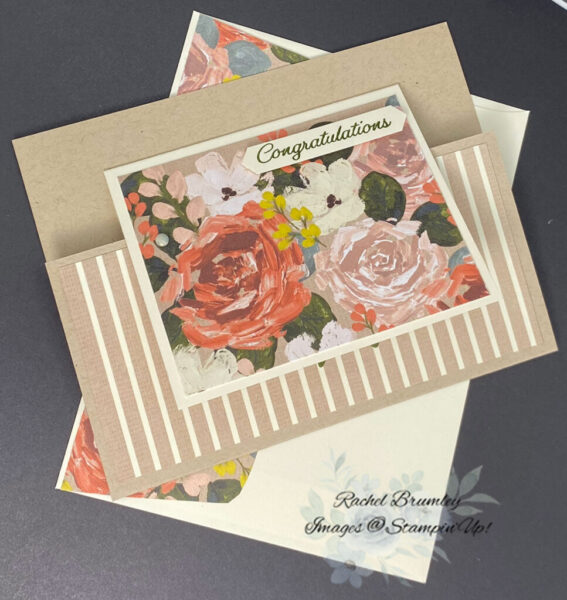
Card Instructions:
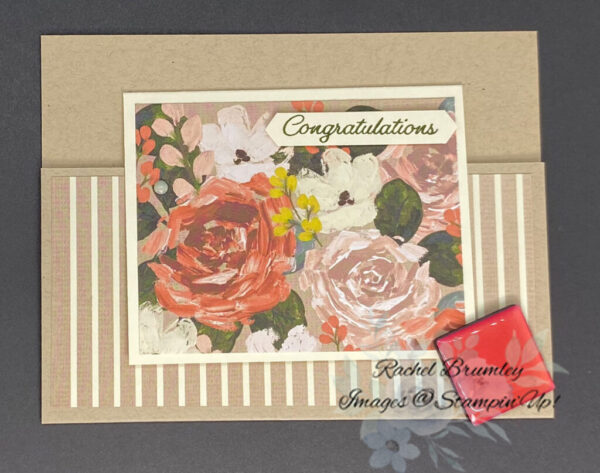
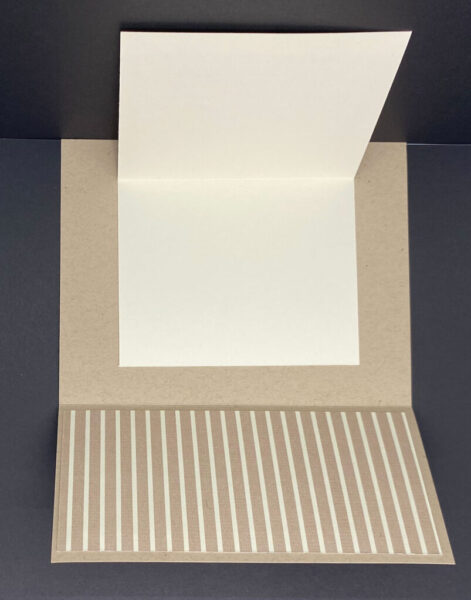
- Cut Crumb Cake cardstock to 5 1/2″ x 7″ and score at 4 1/4″.
- Fold at the 4 1/4″ mark toward you.
- Attach the striped DSP to the outside bottom flap.
- Cut Very Vanilla cardstock, fold at 3″, and attach to the front of the card, ensuring it’s even on all sides.
- Add the floral DSP to the Very Vanilla cardstock insert.
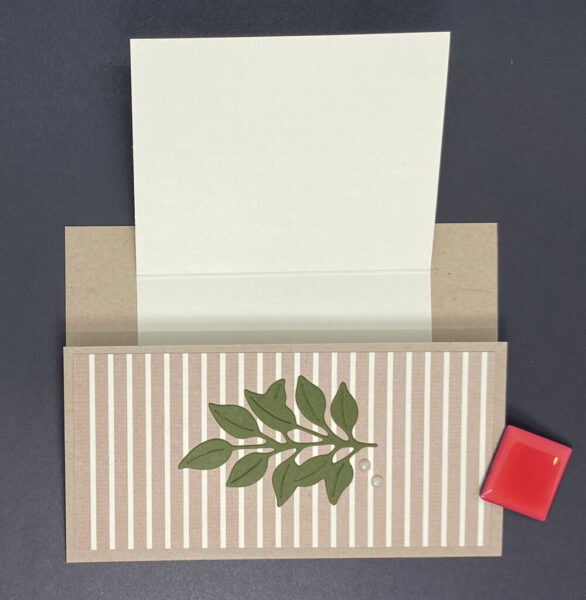
- Open the bottom flap and adhere the same DSP used on the outside bottom flap.
- Attach die-cut leaves (from the Lovely Garden Bundle) to the outside of the bottom flap.
- Add two pearls from the Antique Pearls embellishments.
- Stamp “Congratulations” (from the Extraordinary Bundle) in Mossy Meadow ink. Die cut the sentiment and attach to the front of the card. Add a single pearl to the left side of the sentiment.
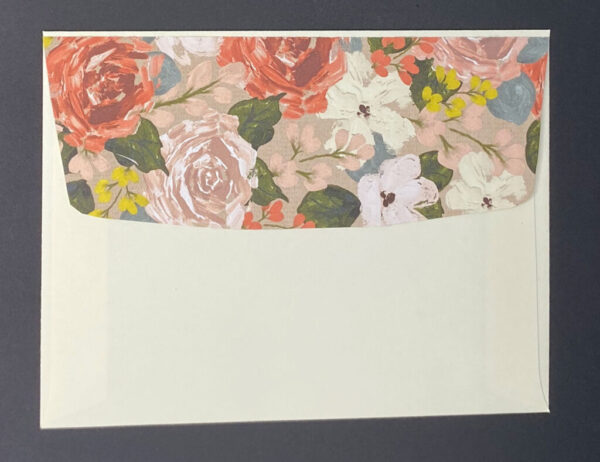
Attach the DSP to the envelop flap and trim to size.
Thank you for visiting my blog! I hope today’s card design inspires your own Stampin’ Up! projects. Don’t forget to check out my Card Gallery for more ideas using your favorite Stampin’ Up! products. Your support means the world to me. If you need supplies or have any questions, I’m here to help as your Stampin’ Up! demonstrator—just give me a call or send me an email.
Happy stamping, and let’s keep crafting together!

Card Measurements:
- Crumb Cake Cardstock card base (5 1/2″ x 7″), score at 4 1/4″
- Striped DSP for lower outside flap (5 1/4″ x 2 1/2″)
- StripedDSP for inner flap (5 1/4″ x 2 1/2″)
- Square Insert (6″ x 3 3/4″), score at 3″
- Floral DSP layer for inser (3 1/2″ x 2 3/4″)
- Sentiment: Scrap of Very Vanilla Cardstock

Supplies
Brushed with Beauty DSP will be available 4 November.
