Hi Stampers

I cannot believe it sold so fast! It was only on the market for one week. Now to start packing!

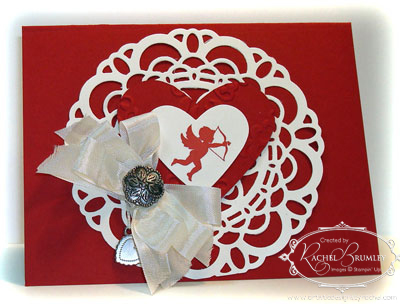
I know that I've shown this card to you early this month but I wanted you o see what a beautiful card you could make with the Paper Doily Sizzlits Die. I had a couple of questions on how to use this die and thought I would pass this information on.
With the Paper Doily Sizzlits Die (item 125592) you can now create the intricate designs you've grown to love with our Sizzlits Dies, in a new, larger size. Some of you have asked questions about the die and we're here to help answer those questions.
A few tips and tricks:
- Because of variations in materials, you will most likely need to use a shim (such as piece of card stock) when you send it through the Big Shot.
- The detailed intricacy comes with a little added work. The negative pieces will not come out automatically when you cut the die.
- It may take a little time to remove all the cut pieces from the die-cut paper. Remove the pieces by poking or punching them out. Carefully, push the pieces through the cut design and remove them from the back. Make sure you work from the front side of the doily (the side that was face-down when it was cut) and push the pieces through; if you try to pull them out from the front or if you push them through from the back side, the doily might tear. To make it easier, gently roll the die-cut paper to pop out some of the larger pieces.
- Push the pieces out using the Paper-Piercing Tool or the small end of the Simply Scored Stylus.
- The front side will look completely cut through, however, the back side may not. This is normal with this die, and if you follow the directions of removing the small pieces you will find that the die has cut through the paper.
- Because of the intricate design of this die, small pieces might stick in the foam on the actual die. Clear all small pieces from the die before using it again. This will ensure you get a clean cut every time. Remove the remaining pieces by using your Paper-Piercing Tool, being careful not to tear the foam on the die.
The most important thing to remember is that with the intricate delicacy and detail comes some added work. The larger Sizzlits dies require a bit more time to use than other dies and that there is a certain amount of hands-on effort involved in creating with these detailed designs. However, you will find with the gorgeous finished piece, the little bit of extra effort is totally worth it!
Thanks for stopping by today!


Congratulations! Have you found your new home yet?
That’s wonderful, especially with the economy. So happy for you guys, happy packing!
TypePad HTML Email
Thanks Angela!
Stampin Up! Demonstrator, ManagerClasses in card making and scrapbookingMy Blog Artistic Designs by Rachel(479) 876-7453rachelbrumley@cox.netContact me today to get your FREE copy of the Occasions Mini Catalog, the Sale-a-Bration Mini Catalog and/or the 2011/2012 Idea Book Catalog