Winter Wonderland Ornament Card: A Cozy Cabin Christmas Scene

Hi Crafty Friends!
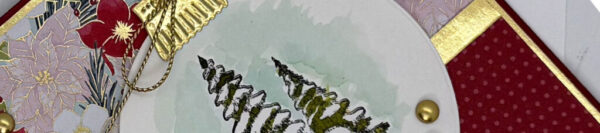
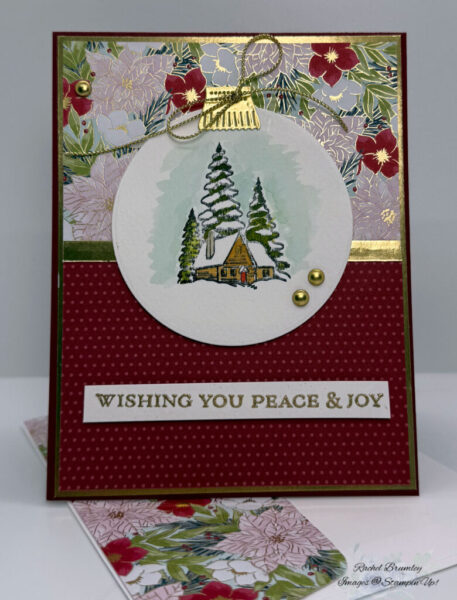
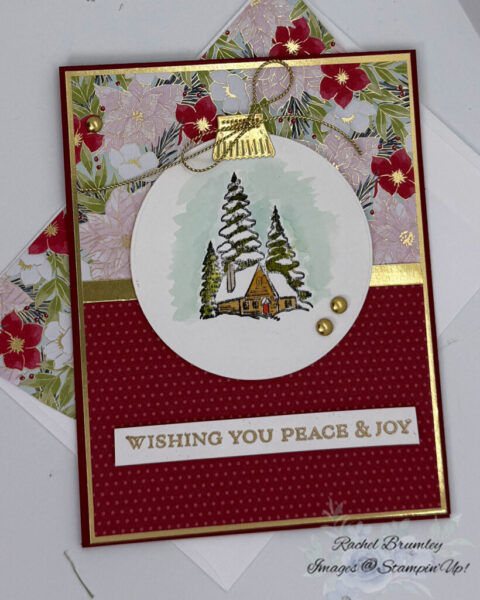
There’s something so magical about creating cards, using the Winter Scene Stamp Set, that capture winter’s peaceful beauty, and this ornament-shaped card does exactly that! I fell in love with the cozy cabin nestled among snow-covered evergreens – it reminds me of those picture-perfect winter scenes that make you want to curl up by a fireplace. The rich Cherry Cobbler and elegant florals create such a beautiful frame for this serene winter wonderland. Let me show you how I brought this festive vision to life!
How I Made This Winter Wonderland Ornament Card:
I started by cutting my Cherry Cobbler cardstock to 11″ x 4¼” and folding it in half with a Bone Folder to create my card base. Next, I cut a piece of the Traditions of Christmas Designer Series Paper (DSP) to 5⅜” x 4⅛”, then cut that piece in half. I flipped one half to showcase the Cherry Cobbler print and adhered both pieces to the front of my card.
Using the ornament circle die from the Ornament Christmas Dies, I cut a circle from 100 Fluid Watercolor Paper for my ornament base. I stamped the winter cabin and trees image in the center using Memento Tuxedo Black ink, then colored the scene with a Watercolor Brush and Inks – I used Old Olive for the trees and Real Red Ink and Daffodil Delight Ink for the cozy cabin.
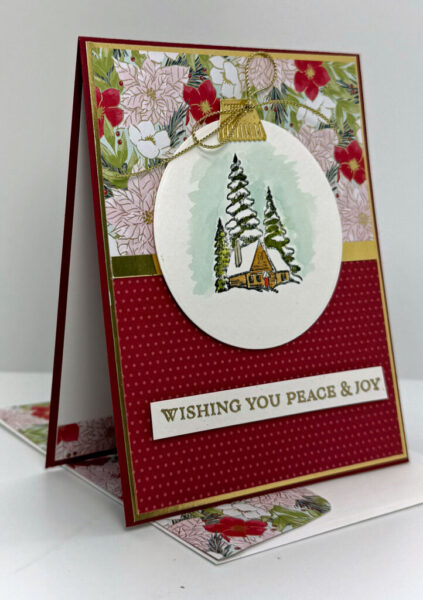
For the ornament cap, I die cut a small shape from Gold Foil cardstock (Ornamental Christmas Dies) and attached it to the top of my circle with a piece of Gold Cord for that perfect hanger detail. I mounted the completed ornament onto the floral background using Stampin’ Dimensionals to give it some beautiful dimension, then added Gold Adhesive Backed Dots around the ornament for extra sparkle.
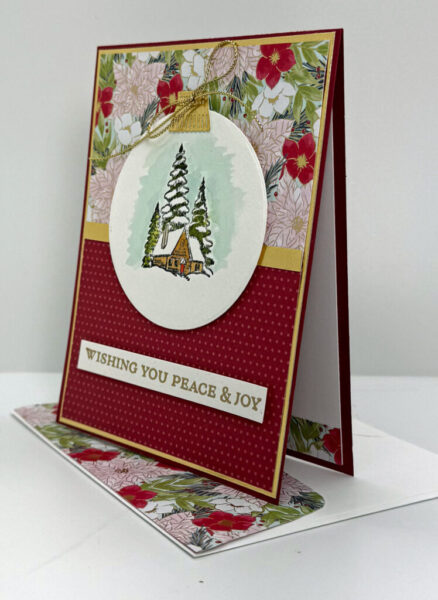
Finally, I stamped “WISHING YOU PEACE & JOY” on Basic White cardstock with Versamark Ink. I then added Gold Embossing Powder and heat set with the Heat Tools and trimmed it to size, and adhered it to the bottom over the Cherry Cobbler polka dot paper.

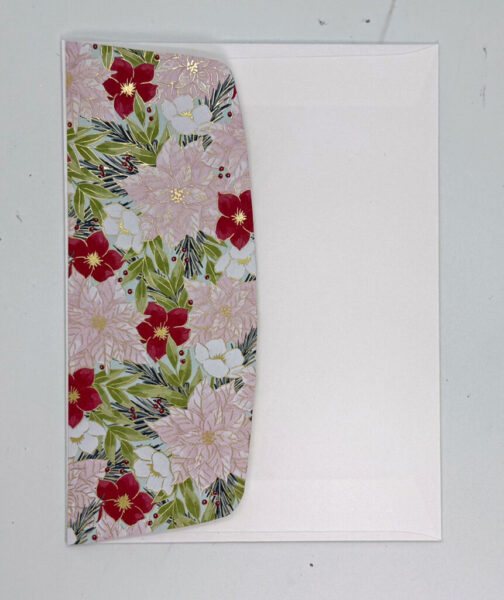
I added a small strip of the same Designer Series Paper to the inside of the card and used it on the envelope as well for a beautifully cohesive look.
Thank you for visiting my blog! I hope today’s card design inspires your own Stampin’ Up! projects. Don’t forget to check out my Card Gallery for more ideas using your favorite Stampin’ Up! products. Your support means the world to me. If you need supplies or have any questions, I’m here to help as your Stampin’ Up! demonstrator—just give me a call or send me an email.
Happy stamping, and let’s keep crafting together!

Card Measurements:
- Base card: Cherry Cobbler Cardstock (11″ x 4 1/4″)
- Layer #1: Gold Foil Cardstock (5 3/8″ x 4 1/8″)
- Layer #2: Traditions of Christmas Designer Series Paper (DSP) (5 1/4″ x 4″)
- Layer #3: 100% Fluid Water color Paper (3″ x 3″)
- Sentiment: Strip of watercolor paper (3 1/2″ x 3/8″)
- Inside of Card: Basic White Cardstock (5 1/4″ x 4″)
- Strip: Traditions of Christmas DSP (4″ x 3/8″)
- Envelope: Traditions of Christmas DSP (6″ x 2 1/2″)

Supplies