Autumn Gratitude: Creating Layered Thanksgiving Cards with Fall Leaves and Acorns”

Hello my Crafty Friends!
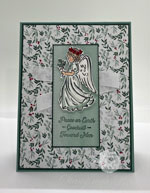
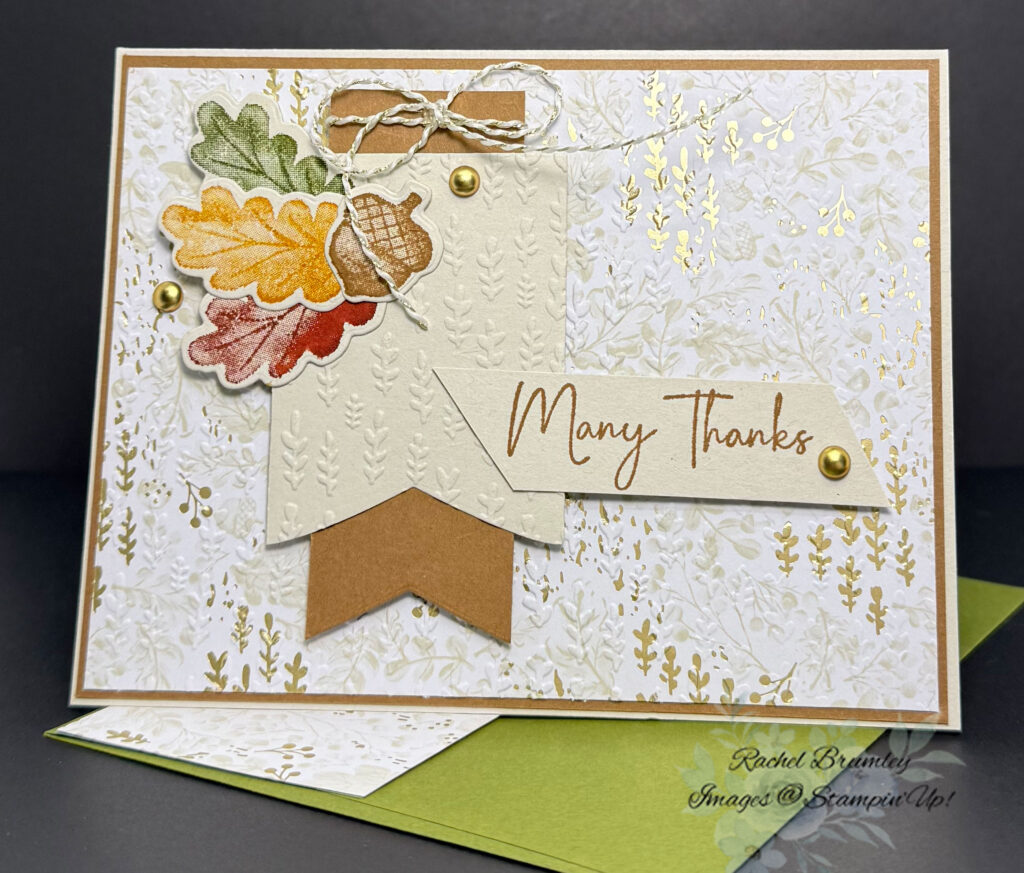
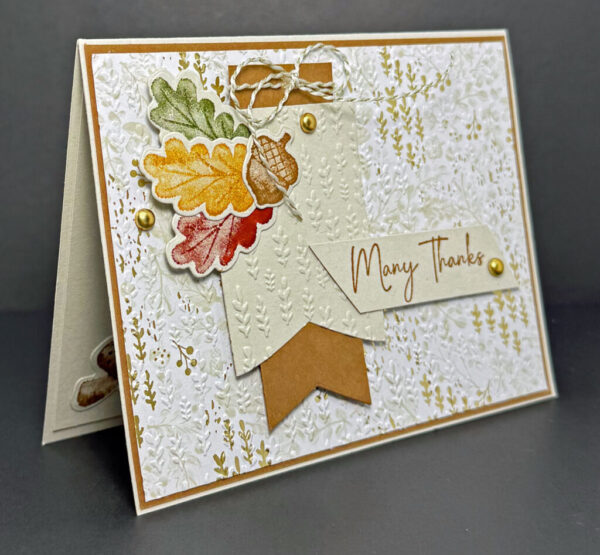
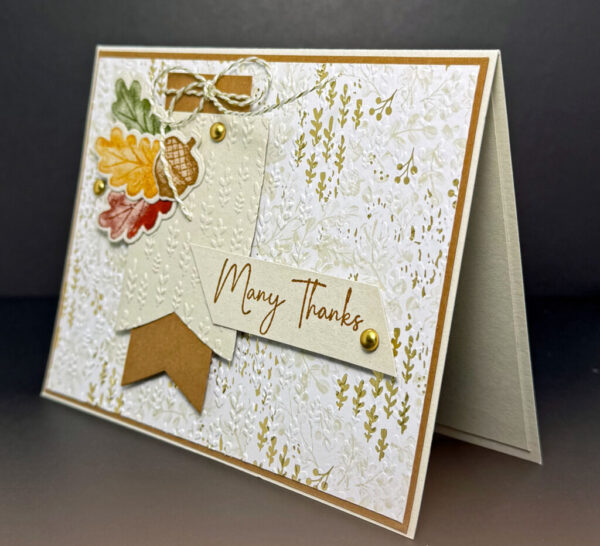
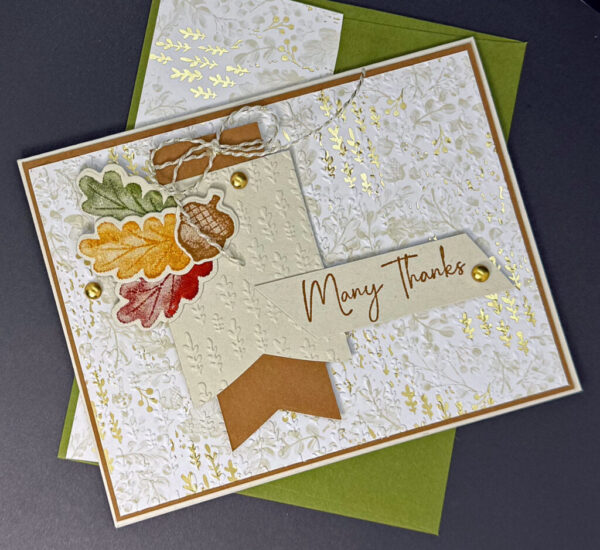
This card, using Gathering Moments Bundle, brings together all my favorite fall elements in one cozy design! I used a gorgeous embossed background that gives the whole card that subtle textured feel, then layered on these beautiful oak leaves in classic autumn colors – that golden yellow and deep red just scream fall to me. The little acorn tucked in with the leaves adds such a sweet touch, and I love how the “Many Thanks” sentiment sits on that angled banner. Those little gold enamel dots scattered around give it just the right amount of sparkle without being too much.
Measurements:
- Base Card: Basic Beige Cardstock (8 1/2″ x 5 1/2″). Fold in half using a Bone Folder for a sharper crease.
- Layer #1: Pecan Pie Cardstock (5 3/8″ x 4 1/8″)
- Layer #2: Gathering Together Designer Series Paper (DSP) (5 1/4″ x 4″)
- Layer #3: Pecan Pie Cardstock (3 1/2″ x 1 1/4″)
- Layer #4: Gathering Together DSP (2 1/2″ x 1 7/8″)
Instructions:
- Start by cutting your Basic Beige cardstock to 5.5″ x 4.25″ and fold in half using a Bone Folder for a sharper crease.
- Run Layer #2 through your Stampin’ Up! Cut & embossing Machine using the Metal Plate 3D Embossing Folder to create that beautiful textured background. Mount this onto Pecan Pie Cardstock (Layer #1) and adhere to the base card.
- Stamp your oak leaves on Basic Beige cardstock using the fall colors – I used Crushed Curry for the middle leaf, Cajun Craze for the lower leaf, and Old Olive for the top leaf. Stamp the acorn in Pecan Pie. Die cut out all elements with the coordinating dies from the Gathering Moments Dies.
- For the sentiment, stamp “Many Thanks” on Basic Beige cardstock and cut into a banner shape by trimming the right and the left end at an angle.
- Create your leaf cluster by layering the leaves – see picture for placement, and then add the acorn. Wrap a small piece of Basic & Gold Baker’s twine around the upper Pecan Pie Banner and tie in a loose knot.
- Attach the embossed Basic Beige to the Pecan Pie Banner. Both die cut from the Party Banners Dies.
- Adhere the leaf cluster to the upper left area of your embossed background using Stampin’ Dimensionals for depth. Position the sentiment banner across the lower portion and secure with adhesive.
- Finish by adding gold dots, from the Brushed Metallic Adhesive-Backed Dots, in a scattered pattern around the card – I placed them near the sentiment and in the upper right area for balance.
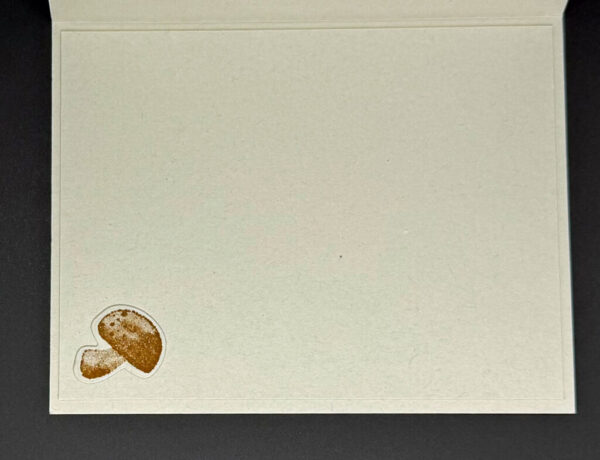
- Inside of card: Stamp the mushroom image with Pecal Pie on Layer #1
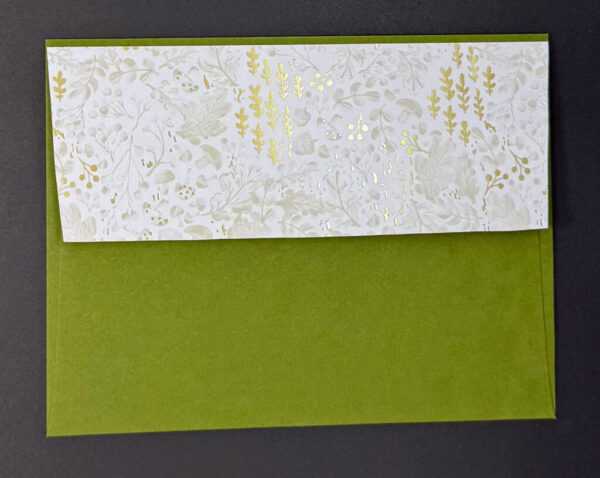
- Envelope Flap: Adhere the Gathering Moments DSP to the flap of the envelope.
Thank you for visiting my blog! I hope today’s card design inspires your own Stampin’ Up! projects. Don’t forget to check out my Card Gallery for more ideas using your favorite Stampin’ Up! products. Your support means the world to me. If you need supplies or have any questions, I’m here to help as your Stampin’ Up! demonstrator—just give me a call or send me an email.
Happy stamping, and let’s keep crafting together!


Supplies