Handcrafted Autumn Wishes: Creating Seasonal Cards with Warmth and Style

Hi my Crafty Friends!
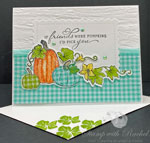
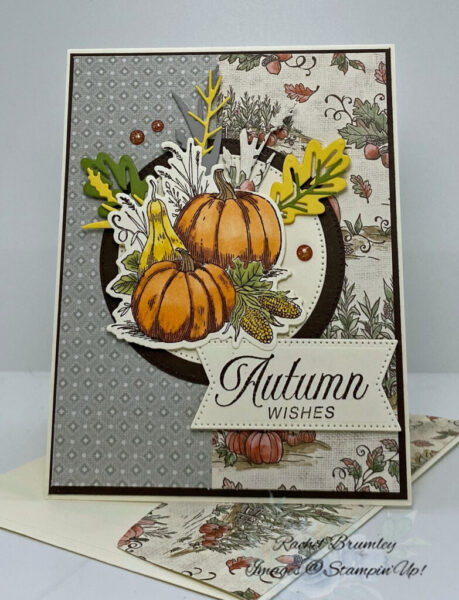
Crisp autumn air, vibrant leaves, and festive pumpkins—fall offers endless inspiration. Celebrate this season of change and gratitude with the Amber Autumn Stamp Set. This versatile collection combines heartfelt sentiments with beautiful autumnal imagery, making it perfect for crafting stunning fall cards and seasonal home decor.
Card Instructions:
Step 1: Prepare the Card Base
Cut cream cardstock to 11″ x 4 1/4″, then fold in half using a Bone Folder for a sharp crease.
Step 2: Create the Background Layers
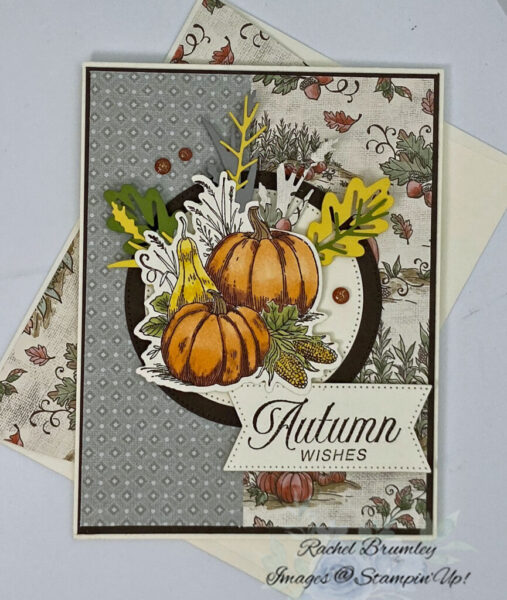
- Cut gray polka dot paper to 2″ x 5 1/4″
- Cut Autumn Toile Designer Series Paper (DSP) to 2″ x 5 1/4″
- Layer and adhere to the card base
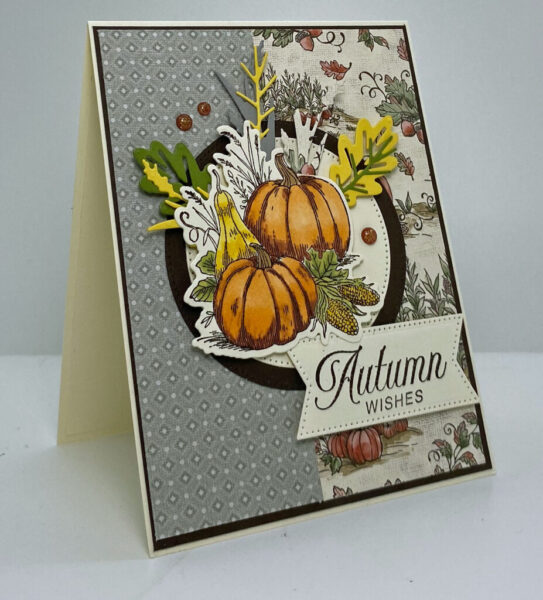
Step 3: Stamp and Color the Main Image
- Stamp the pumpkin and foliage cluster on Very Vanilla cardstock
- Color with Cajun Craze, Pumpkin Pie for the pumpkins, Daffodil Delight for the squash, Old Olive for the leaves and Pecan Pie Stampin’ Blends for stems.
- Use the coordinating dies from the Amber Autumn Dies for the foliage behind the pumpkins. Cardstock used was Daffodil Delight, Old Olive, Gray Granite and Autumn Toil DSP.
Step 4: Create the Focal Point
- Die-cut a scalloped circle from Early Espresso cardstock
- Die-cut a slightly smaller plain circle from Very Vanilla cardstock
- Die cut your colored image and layer onto the Very Vanilla circle
- Mount on the Early Espresso circle for contrast
Step 5: Make the Sentiment Banner
- Die-cut a banner using the Stylish Shapes Dies from Very Vanilla cardstock
- Stamp “Autumn Wishes” in the center with Early Espresso Ink
Step 6: Add Dimension
- Use Stampin’ Dimensionals to mount the focal point
- Layer the sentiment banner with Stampin’ Dimensionals for added depth
- Position both elements on the card front
Step 7: Final Details
- Add small embellishments from the Cajun Craze and Gold Dots as accents
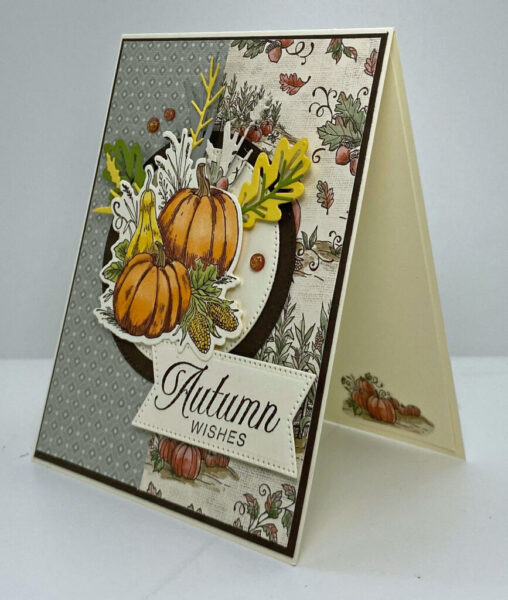
Step 8: Card Interior and Envelope:
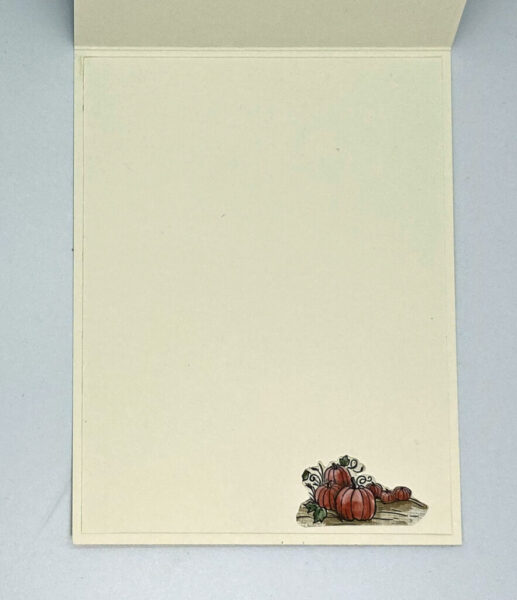
- Line the inside of the card with a layer of Very Vanilla cardstock. Carefully fussy cut a small pumpkin cluster from the Autumn Toile Designer Series Paper and adhere it to the lower right corner.
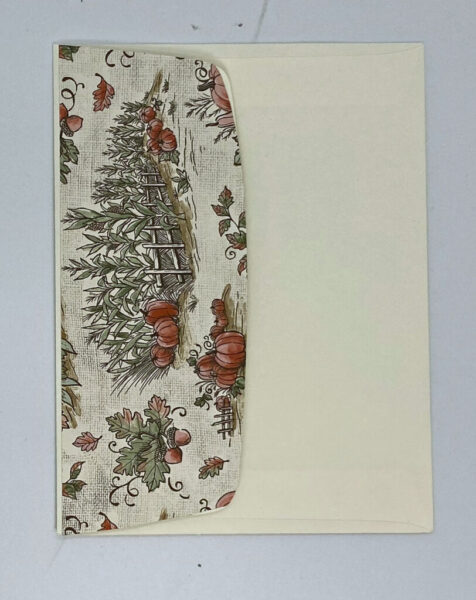
- Complete the coordinated look by using the same Designer Series Paper on the envelope flap as featured on the card front.
Thank you for visiting my blog! I hope today’s card design inspires your own Stampin’ Up! projects. Don’t forget to check out my Card Gallery for more ideas using your favorite Stampin’ Up! products. Your support means the world to me. If you need supplies or have any questions, I’m here to help as your Stampin’ Up! demonstrator—just give me a call or send me an email.
Happy stamping, and let’s keep crafting together!

Coordinating Colors

Supplies