Woodland Christmas Fun Fold Card Using the Rustic Centerpiece Stamp Set

Hello my Crafty Friends!
Another beautiful day—fall couldn’t be more perfect. Though according to the weatherman, it will be gradually cooling down. Soon it’ll be time for hot cocoa and cookies! And sweaters! I love wearing sweaters with jeans and boots. I hope you are outside enjoying this gorgeous weather.
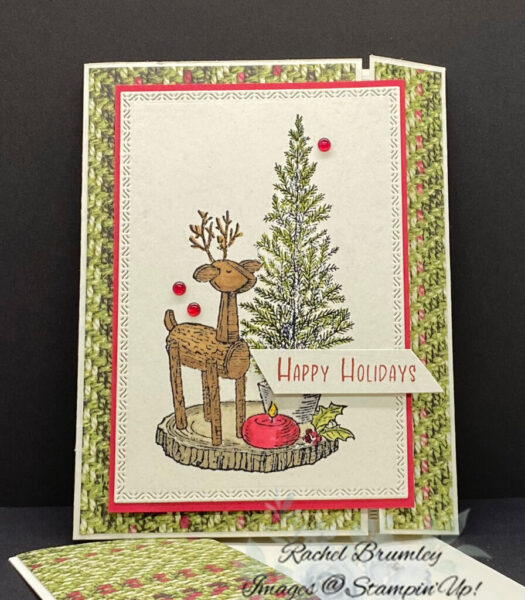
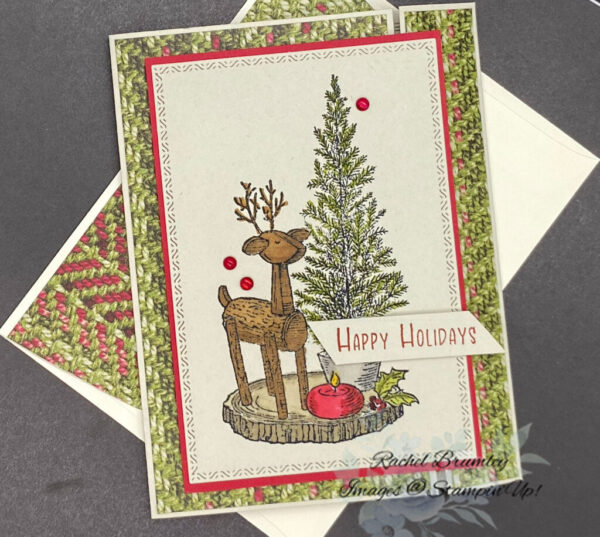
This charming holiday card features a sweet woodland reindeer standing on a rustic wood slice beside a little evergreen tree and a cozy red candle. The scene is framed with a lovely textured paper that has a green and pink mossy pattern, giving it that natural, forest-inspired feel. The “Happy Holidays” sentiment completes this warm and inviting card that’s perfect for sending cozy seasonal wishes!
Instructions:
- Base card: Cut Basic Beige Cardstock to 8 1/2″ x 5 1/2″. Score at 1″ and 5 1/4″, then fold using a Bone Folder for sharp creases.
- Layer #1: Cut Need for Tweed Designer Series Paper (DSP) to 5 3/8″ x 3 1/8″ and attach to the front of the card.
- Layer #2: Cut Need for Tweed DSP to 5 3/8″ x 7/8″ and adhere to the side front panel.
- Layer #3: Cut Real Red Cardstock to 4 7/8″ x 3 1/4″ and set aside until Layer #4 is complete.
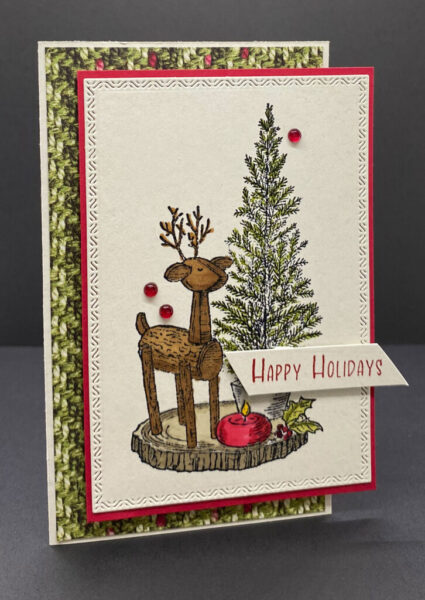
- Layer #4: Basic Beige Cardstock (5″ x 3 1/2″). Stamp the image with Tuxedo Black Ink and color using Stampin’ Blends:
- Pecan Pie for the reindeer,
- Old Olive for the tree and berry leaves
- Real Red for the candle holder and berries, and
- Daffodil Delight for the flame.
- Crumb Cake for the wood centerpiece.
- Die cut the image using the second-largest rectangle die from the Textured Notes Dies, then attach it to the red layer. Adhere the combined layers to the front of the card using Stampin’ Dimensionals.
- To complete the card, add embellishments from the Cherry Cobbler & Pearl Adhesive-Backed Berries.
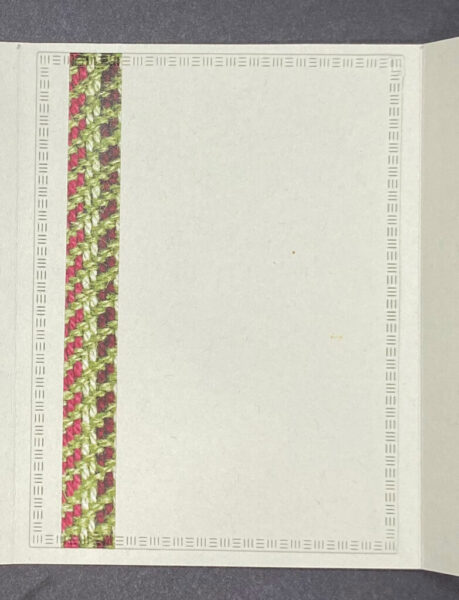

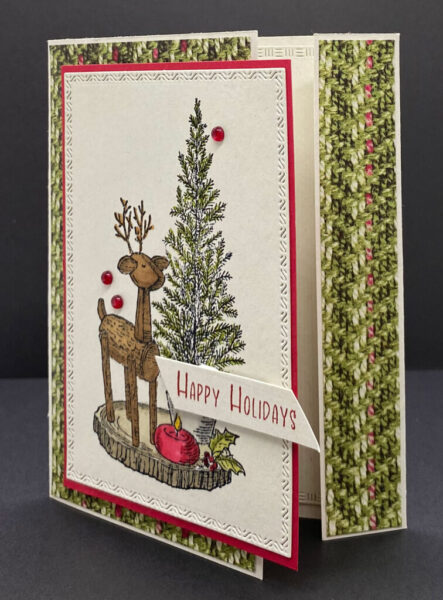
Inside of card and Envelope:
- Layer #1: Cut Basic Beige Cardstock to 5 1/2″ x 4″. Cut a strip of Need for Tweed DSP to 5 1/2″ x 1/2″ and attach to the left side of the cardstock. Die cut using the largest die from the Textured Notes Dies, then adhere to the inside of the card.
- Envelope Flap: Cut Need for Tweed DSP to 6″ x 2 1/4″. Glue to the envelope flap and trim to fit.
Thank you for visiting my blog! I hope today’s card design inspires your own Stampin’ Up! projects. Don’t forget to check out my Card Gallery for more ideas using your favorite Stampin’ Up! products. Your support means the world to me. If you need supplies or have any questions, I’m here to help as your Stampin’ Up! demonstrator—just give me a call or send me an email.
Happy stamping, and let’s keep crafting together!


Supplies