
DIY Thank You Card Tutorial: Creating Dimensional Floral Cards with Paper Layering

Hello my Stampin’ Friends!
Transition your florals from summer to fall with the Charming Day Bundle. These hand-drawn rose and anemone designs feature open line art perfect for coloring. The set includes versatile sentiments for birthday cards, thank-you notes, and more!
Instructions and card measurements below signature.
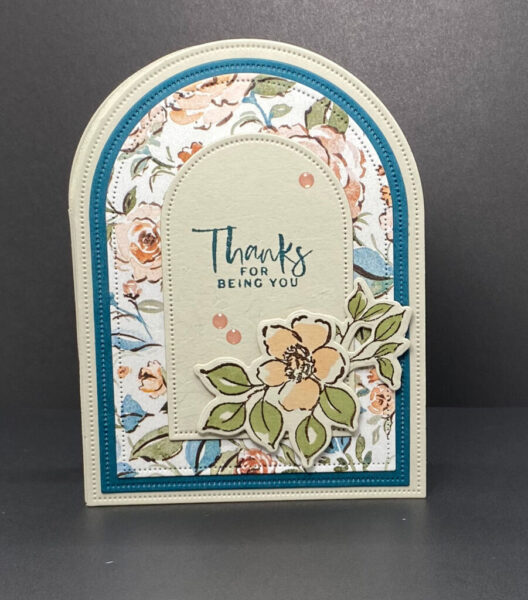
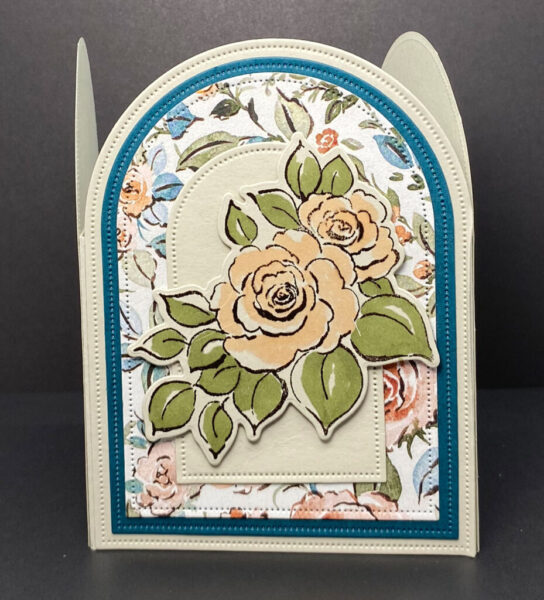
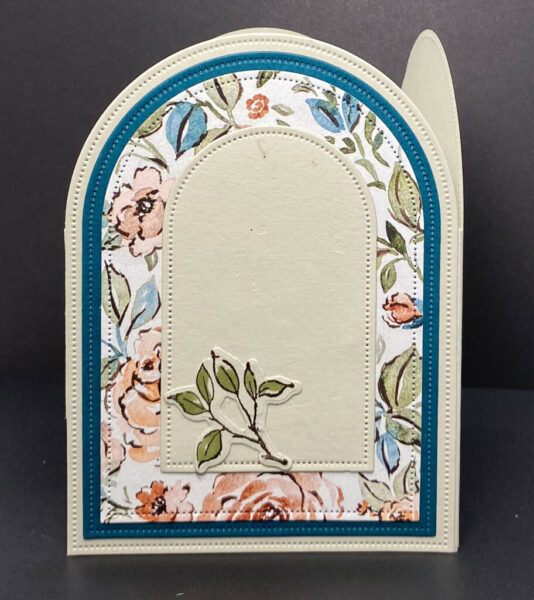
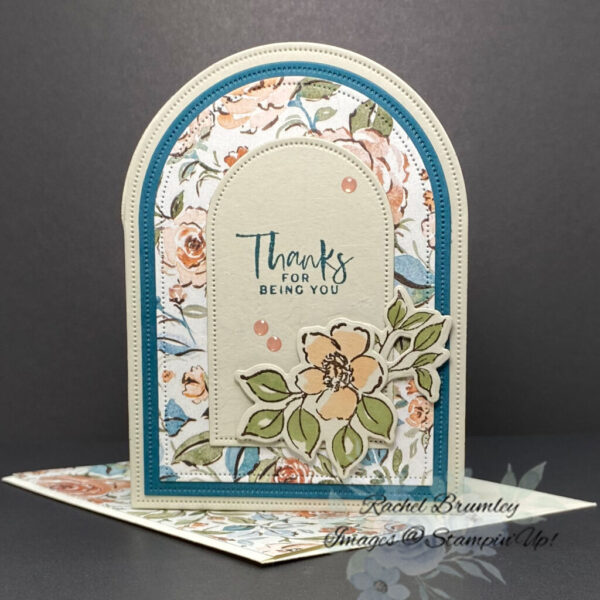
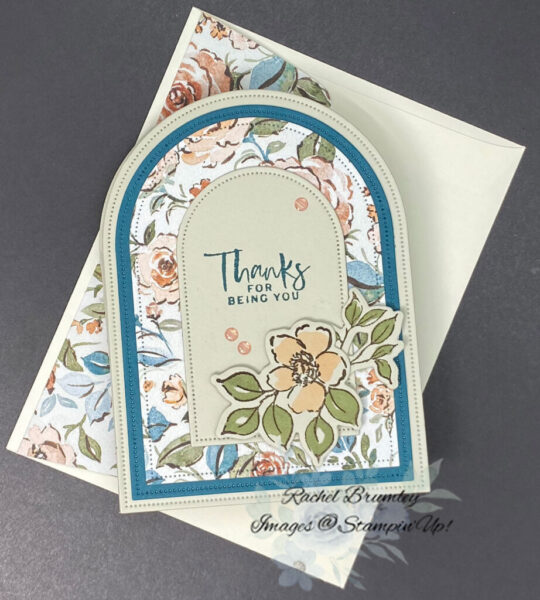
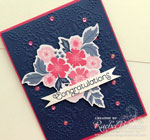
These three panels showcase elegant fun fold card with variations of the same layered arch design. The left features a “Thanks for Being You” sentiment with a single flower, the center highlights dimensional roses, and the right displays a simple branch design. All use matching Basic Beige cardstock, Pretty Peacock cardstock , and the Floral Charm Designer Series Paper.
Thank you for visiting my blog! I hope today’s card design inspires your own Stampin’ Up! projects. And, don’t forget to check out my Card Gallery for ideas using your favorite Stampin’ Up! products. Your support means the world to me. If you need any supplies or have questions, I’m here as your Stampin’ Up! demonstrator – just email me or call me.
Happy stamping, and let’s keep crafting together!
Card Measurments:
- Basic Beige Cardstock (base card): 3 pieces 5″ x 4″
- Pretty Peacock Cardstock (layer #1): 3 pieces 4 3/4″ x 3 3/4″
- Floral Charm DSP (layer #2): 3 pieces 4 1/2″ x 3 1/2″
- Basic Beige Cardstock (top panel): 3 pieces 3 1/4″ x 2 1/4″
- Scraps for large floral image, small floral image and 3 sets of leaves
- Basic Beige Cardstock (band that hold the 3 panels together) 10 3/4″ x 3″
- Floral Charm DSP (for envelope flap): 6″ x 2 1/4″
Card Instructions:
Die Cut:
- Die cut 3 pieces of Basic Beige cardstock with the 2nd largest die in the Everyday Arches Dies.
- Die cut 3 pieces of Pretty Peacock cardstock with the 3rd largest die in the Everyday Arches Dies
- Die cut 3 pieces of Floral Charm DS: with the 4th largest die in the Everyday Arches Dies
- Die cut 3 pieces of Basic Beige (top panel) with the 7th largest die in the Everyday Arches Dies
Stamp, Color and Die Cut:
- Stamp the large and small floral images with Early Espresso ink on Basic Beige cardstock and set aside.
- Stamp the leaves three times on Basic Beige cardstock with Early Espresso ink and set aside
- Color the floral images using Petal Pink for petals and Mossy Meadow Stampin’ Blends for leaves.
- Color all three leaf sets with Mossy Meadow Stampin’ Blends.
- Die cut everything using the coordinating Charming Day Dies.
- Stamp the sentiment on one of the top panels (Basic Beige cardstock) This will be the front of the card.
Assemble the Card:
- Adhere all four layers with your preferred adhesive, following the placement shown in the picture.
- Attach the small floral image and die-cut leaves to the front panel, then add decorative dots as pictured.
- Mount the large floral image on the middle panel and attach small die-cut leaves to the final panel.
- To connect the arch panels, apply glue to the band (Basic Beige cardstock 10¾” x 3″) and position all panels in order on the band.
Envelope:
- Adhere DSP to the envelope flap and trim to fit.
If you have any questions or if I am not clear in the instructions, please contact me at rachelbrumley@cox.net.

Hi Rachel! I’d really like to make this beautiful tri-fold card. What are the scoring measurements on the 10.75″ cardstock base? Thank you for clarifying for me.
Camille
Camille Mayeda
August 27, 2025
Hi Rachel! I’d really like to make this beautiful tri-fold card. What are the scoring measurements on the 10 3/4″ cardstock base? Thank you for clarifying for me.
Camille
Hi Camille
On the long side, I scored at 3 5/8″ and 7 3/8″
Let me know if you have other questions.