No Drama, Just Llama Love: Sweet Floral Hug Card

Hi Stampin’ Friends
Take your crafting to the next level with our Long Time No See Stamp Set! This delightful collection features a sweet dachshund sporting a stretched sweater and an adorable llama. The innovative design lets you stamp across multiple surfaces to build complete, layered images.

Card Instructions:
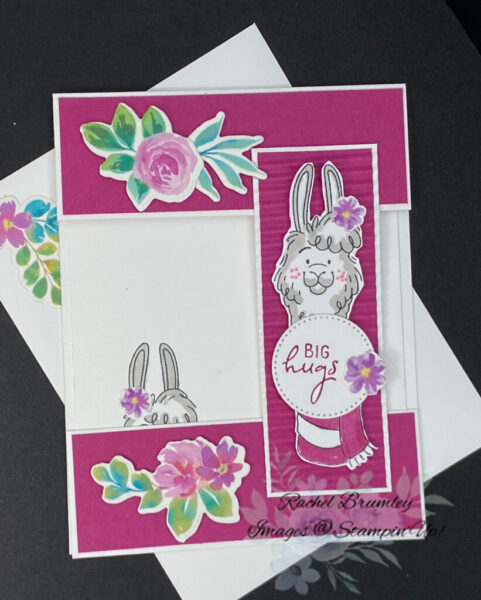
Create the base card using Basic White Thick Cardstock cut to 11″ x 4 1/4″. Fold in half with a Bone Folder to create a sharp crease. From the folded edge, measure down 1 1/2″ and cut across to remove the lower portion. From the piece you just removed, cut a 1 1/2″ x 4 1/4″ strip to form the bottom tier of your stepped card.
Trim the remaining cardstock to 4 1/4″ x 1 1/2″ to create the connecting strip. Cut two pieces of Berry Burst Cardstock to 4 1/8″ x 1 3/8″ and attach them as accent layers to the top panel, bottom panel.
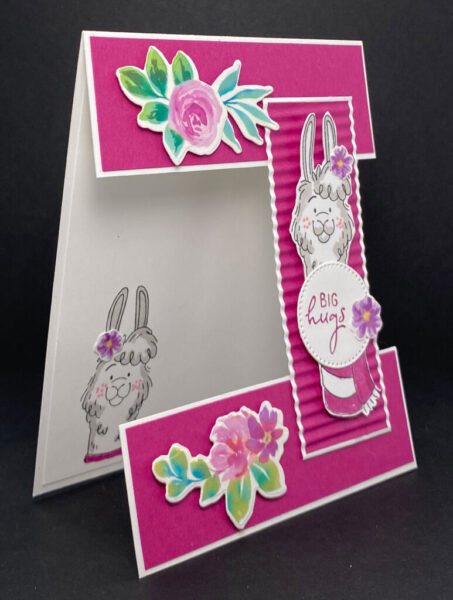
For the connecting strip, cut Berry Burst Cardstock to 4 1/8″ x 1 3/8″ and run it through your die-cut machine using the Mini Corrugated 3D Embossing Folder. Adhere the embossed piece to the Basic White connecting strip using your preferred adhesive.
Stamp the llama image onto Basic White Thick Cardstock using the Tuxedo Black Ink. Color the body with Smoky Slate and the scarf with Berry Burst Stampin’ Blends. Carefully fussy cut around the image and attach it to the connecting strip.
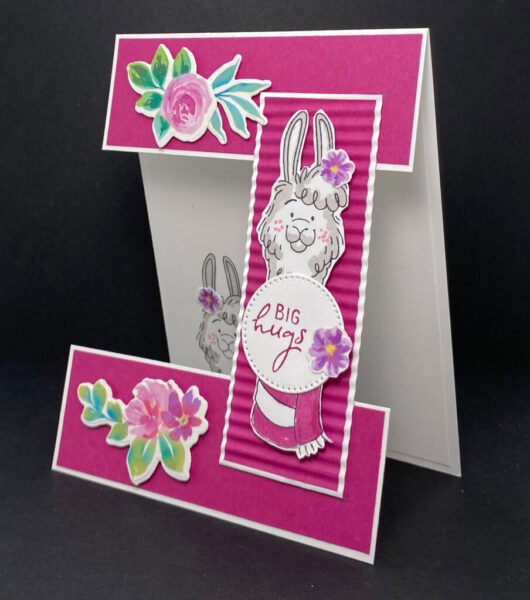
Die cut flowers from the Extraordinary Flora Washi Tape and attach them to the top and bottom panels as shown in the picture.
Stamp the sentiment in Berry Burst ink onto Basic White Thick Cardstock, then die cut using the second-smallest circle from the Stylish Shapes Dies. Attach the sentiment circle to the front of the llama’s scarf and add small flowers to both the sentiment and the top of the llama’s head.
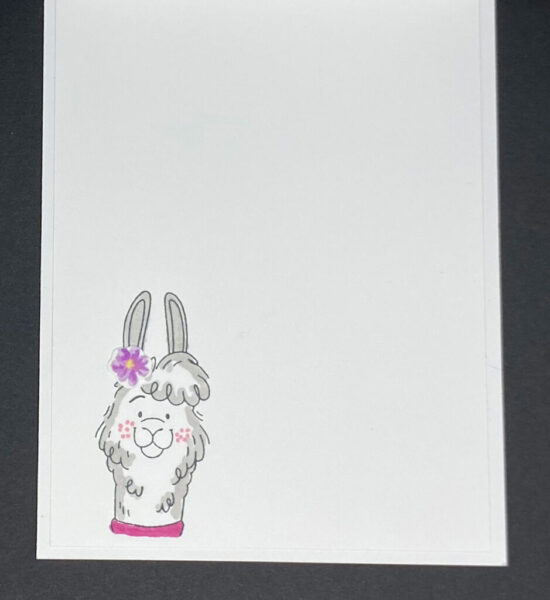
For the card interior, stamp the llama image in the lower left area of the first layer of Basic White Cardstock. Color the body with Smoky Slate and the scarf with Berry Burst Stampin’ Blends, then add a small die-cut flower from the Extraordinary Flora Washi Tape.
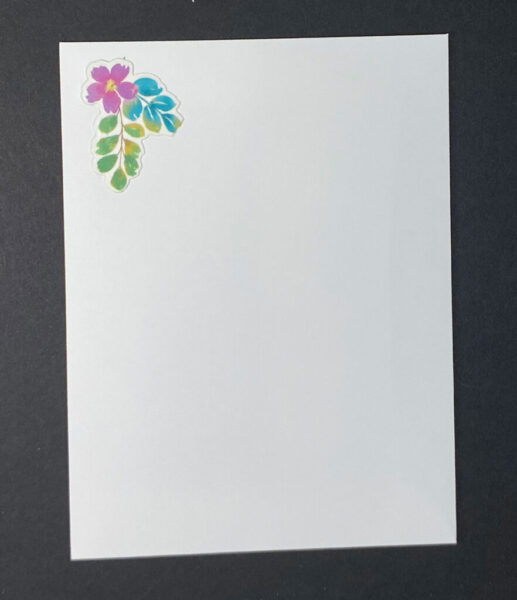
Finish with a coordinating envelope accent by die cutting flowers and leaves from the washi tape and positioning them on the lower left portion of the envelope front.
Thank you for visiting my blog! I hope today’s card design inspires your own Stampin’ Up! projects. And, don’t forget to check out my Card Gallery for ideas using your favorite Stampin’ Up! products. Your support means the world to me. If you need any supplies or have questions, I’m here as your Stampin’ Up! demonstrator – just email me or call me.
Happy stamping, and let’s keep crafting together!